
Brief
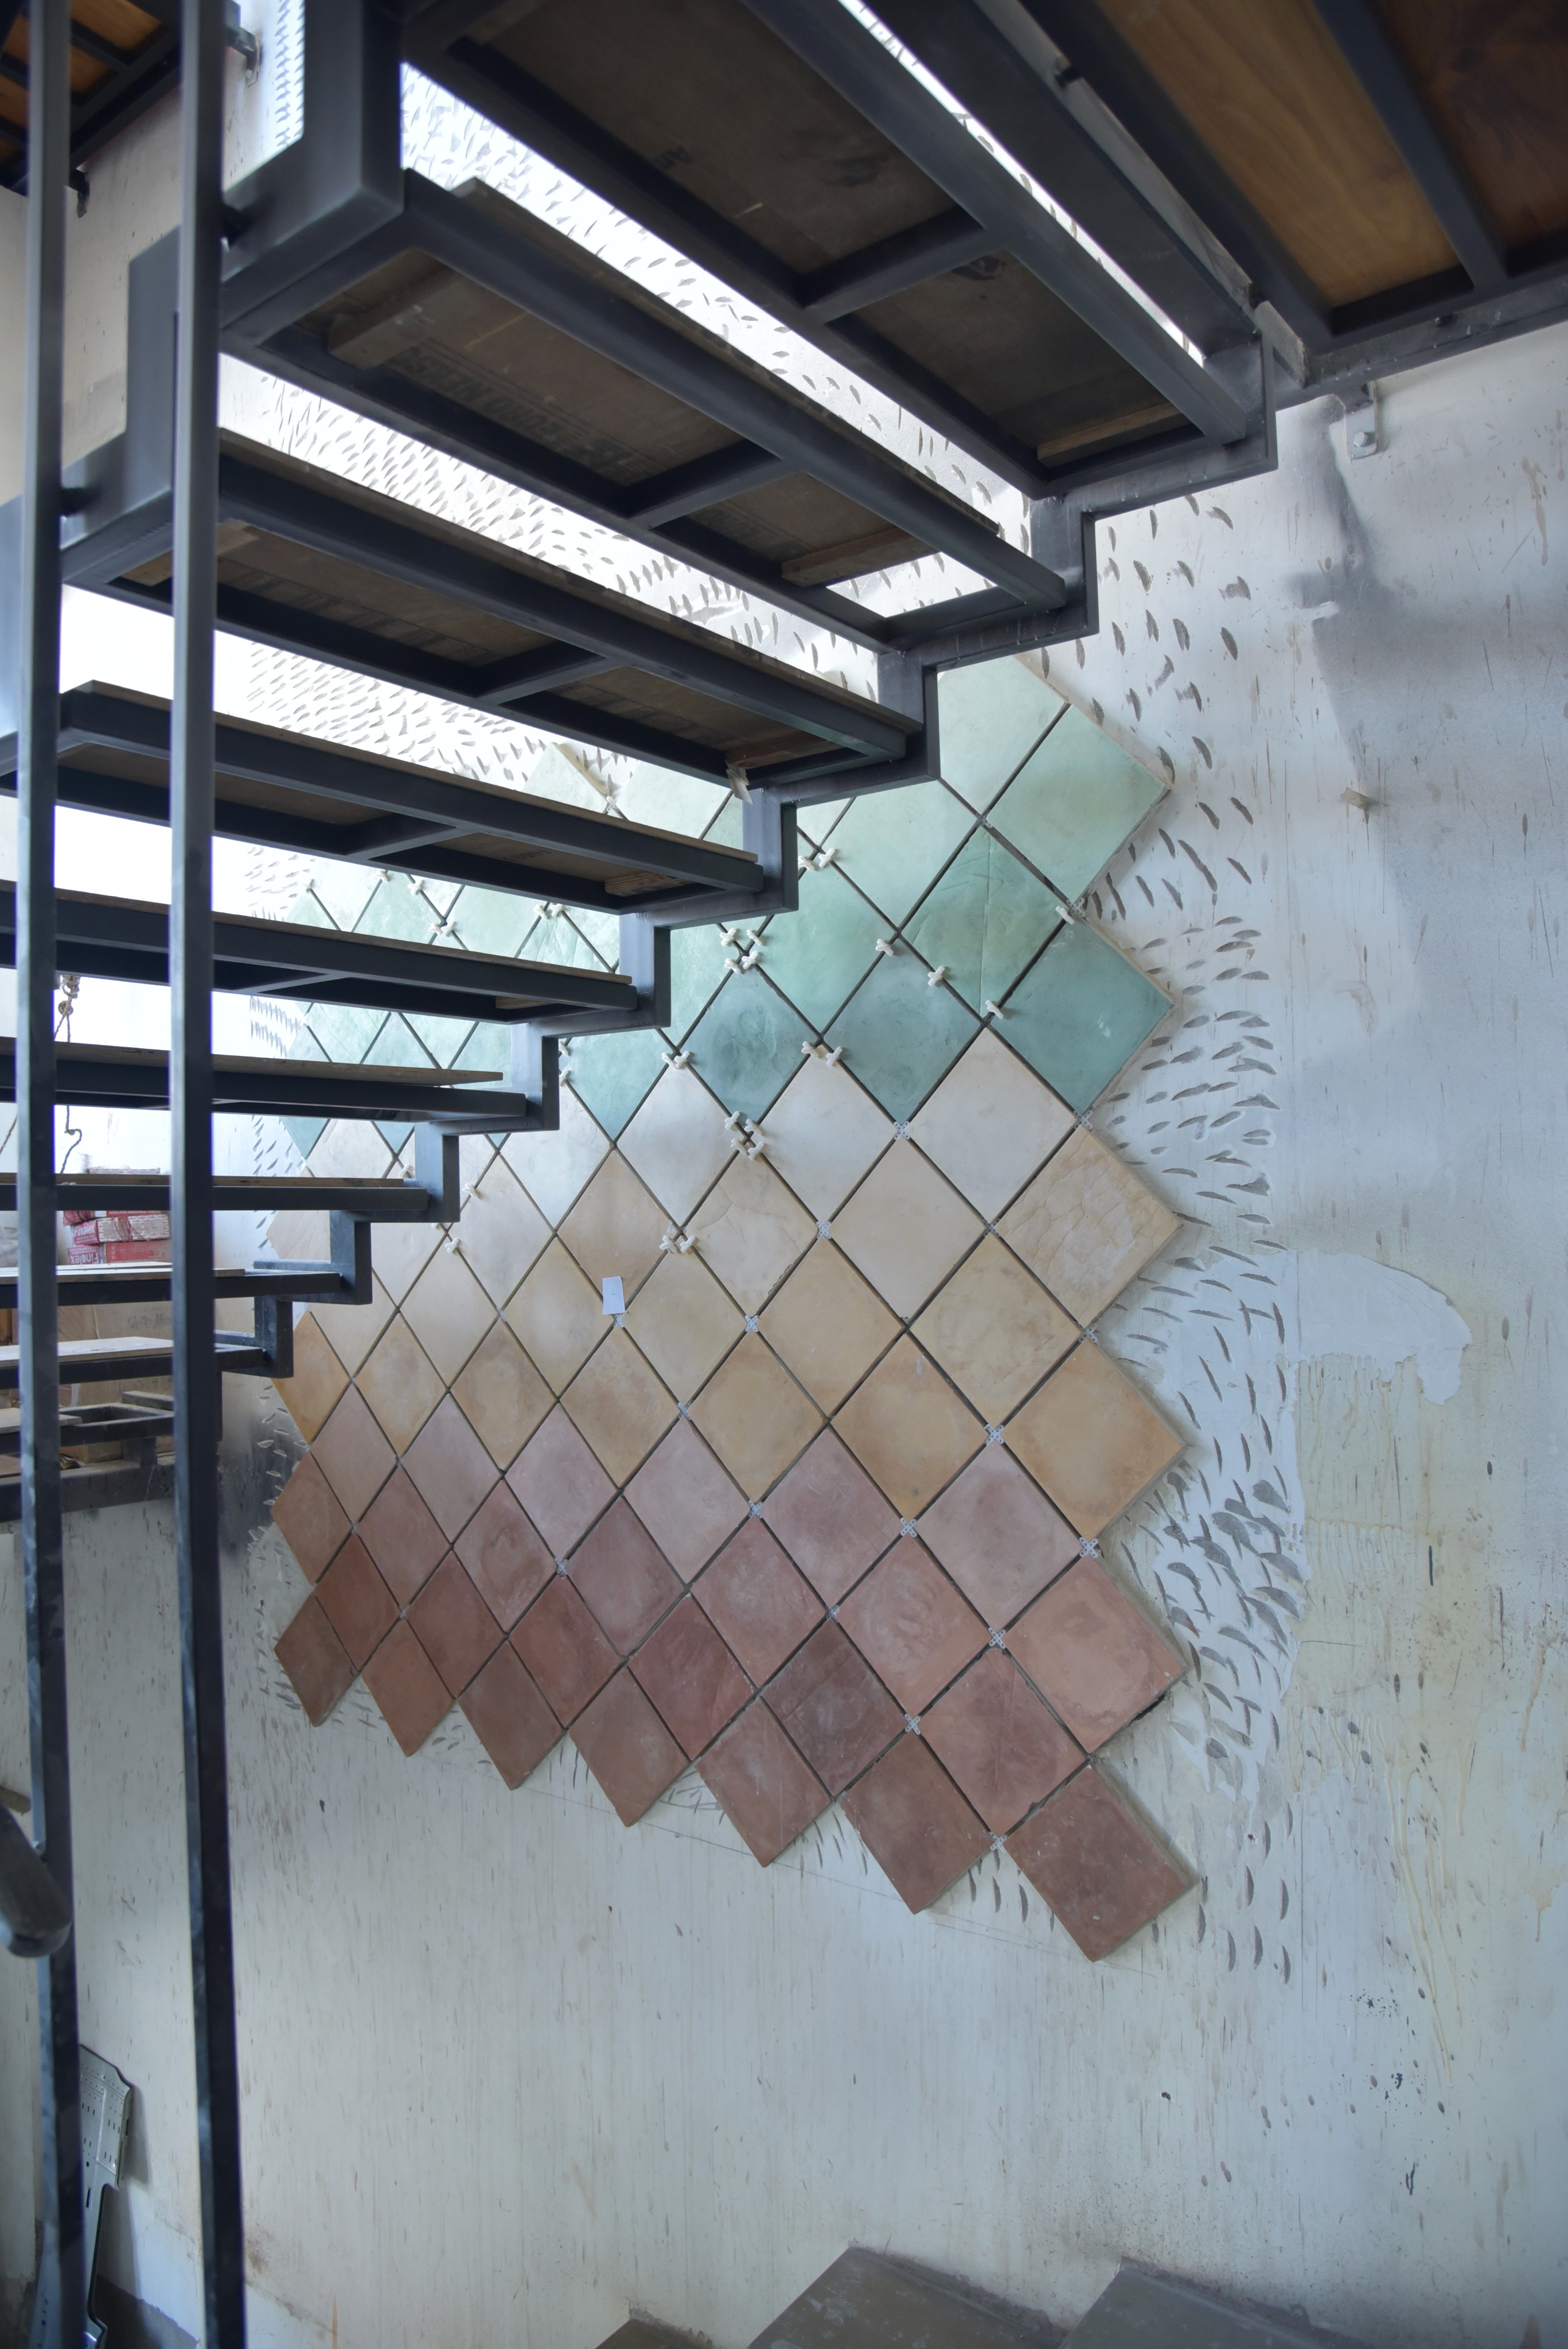
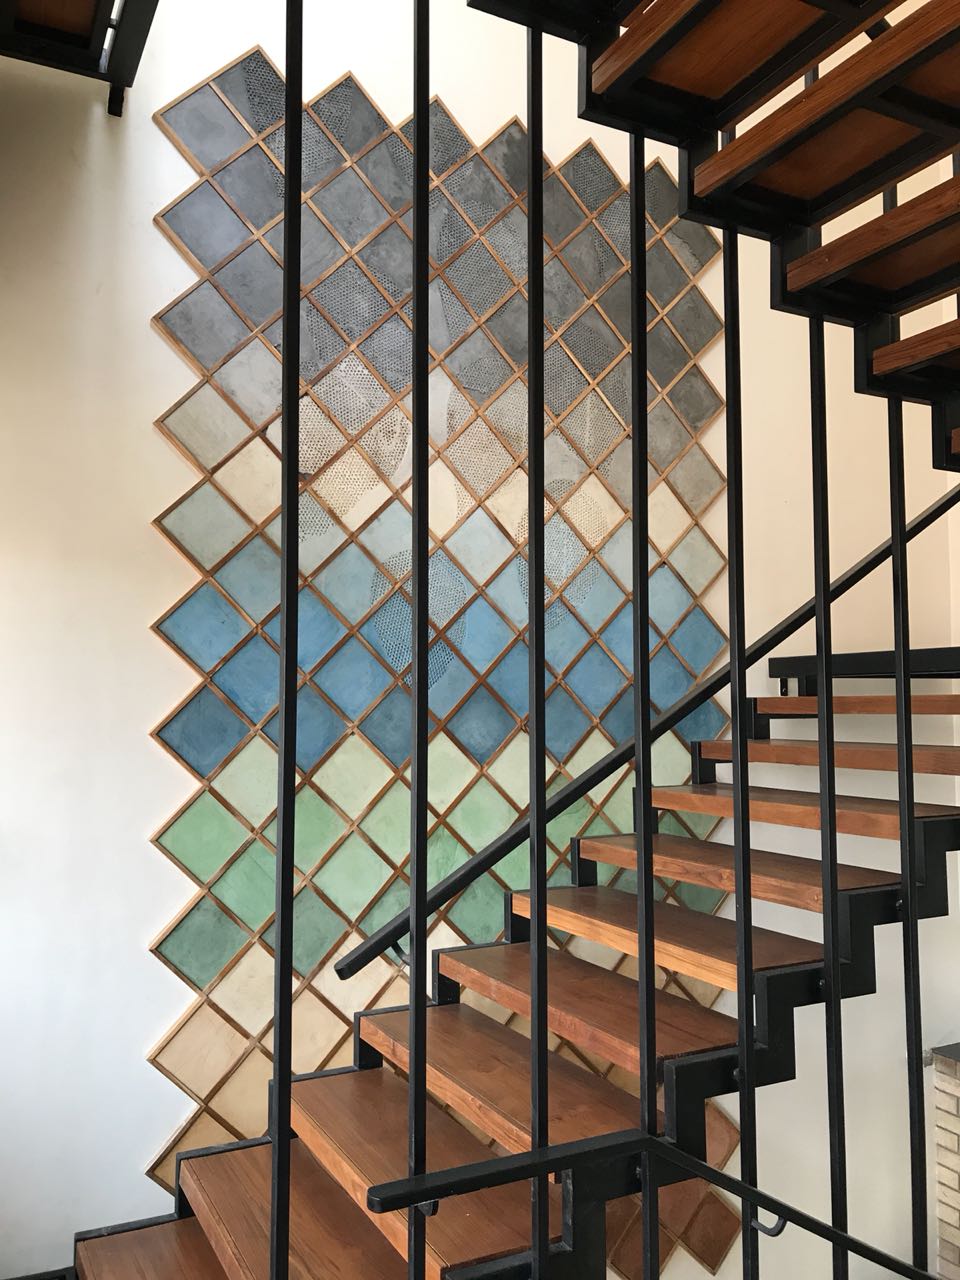
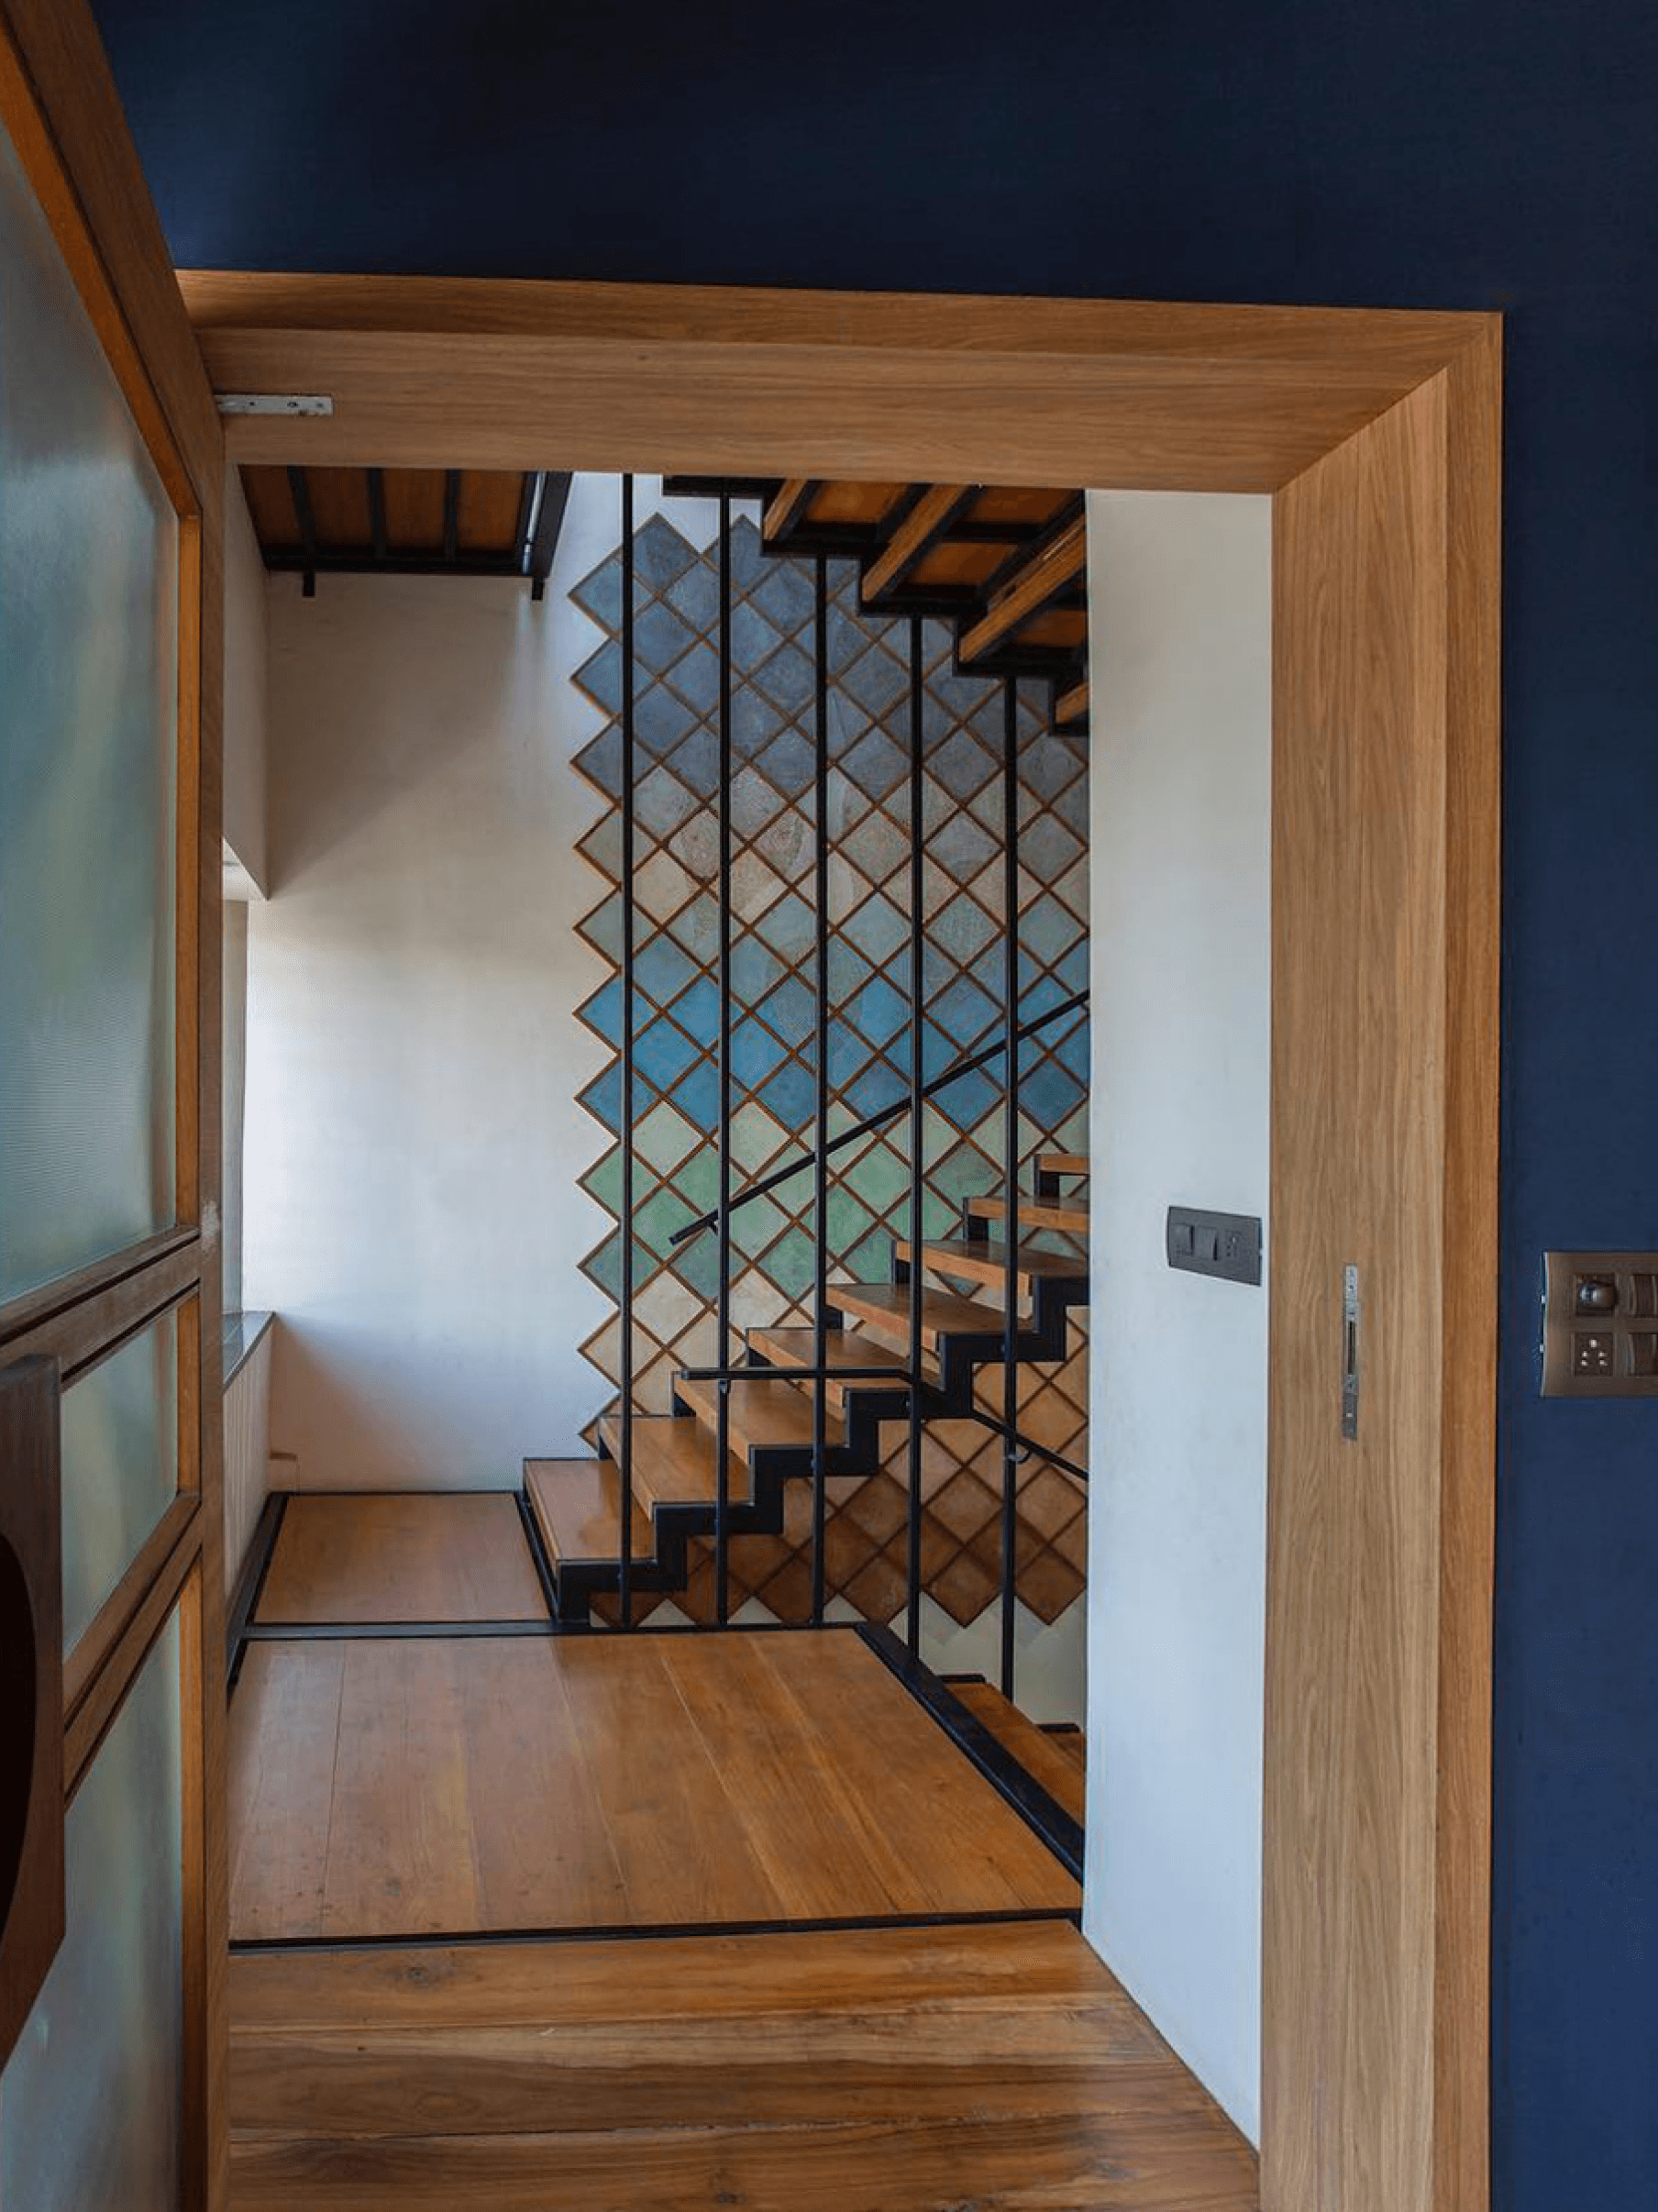
Casting cement tiles of different shades in gradation for a 3' x 6' wall mural in a ceramic import export office
Hands on
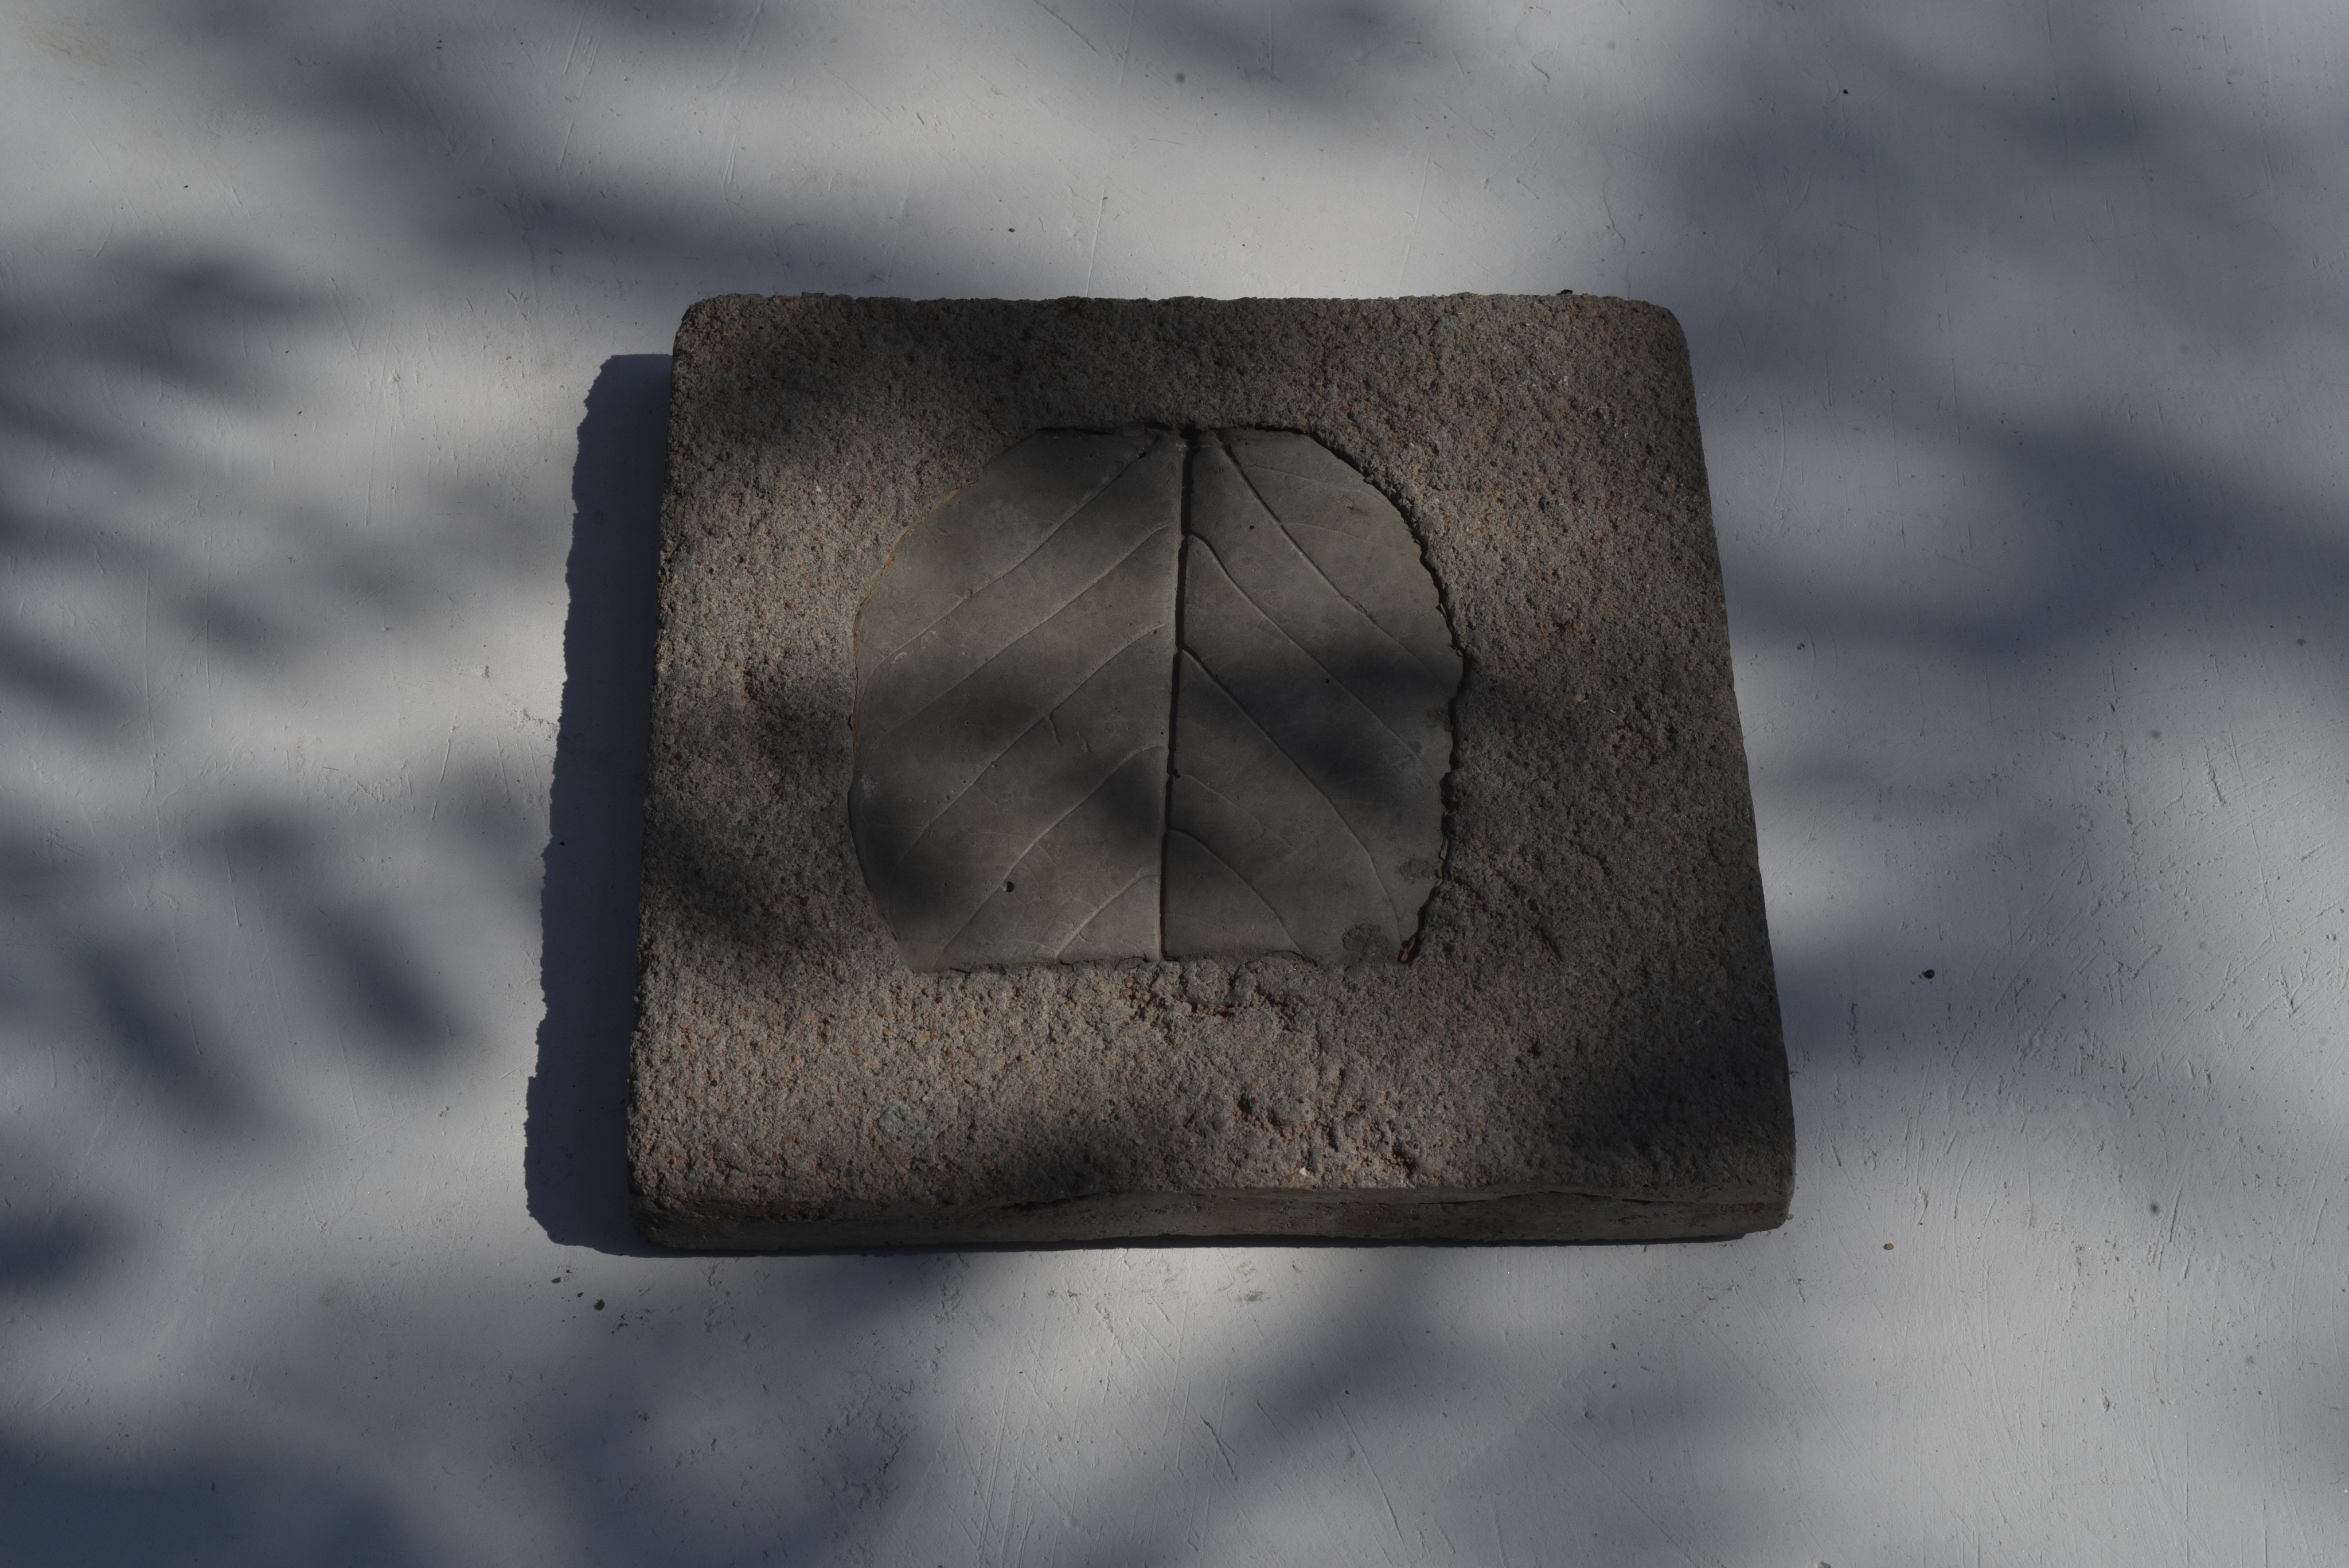
The process included experimenting with cement, various shades of oxide, different ways to create pattern on the tiles.
Pattern exploration by casting different leaves

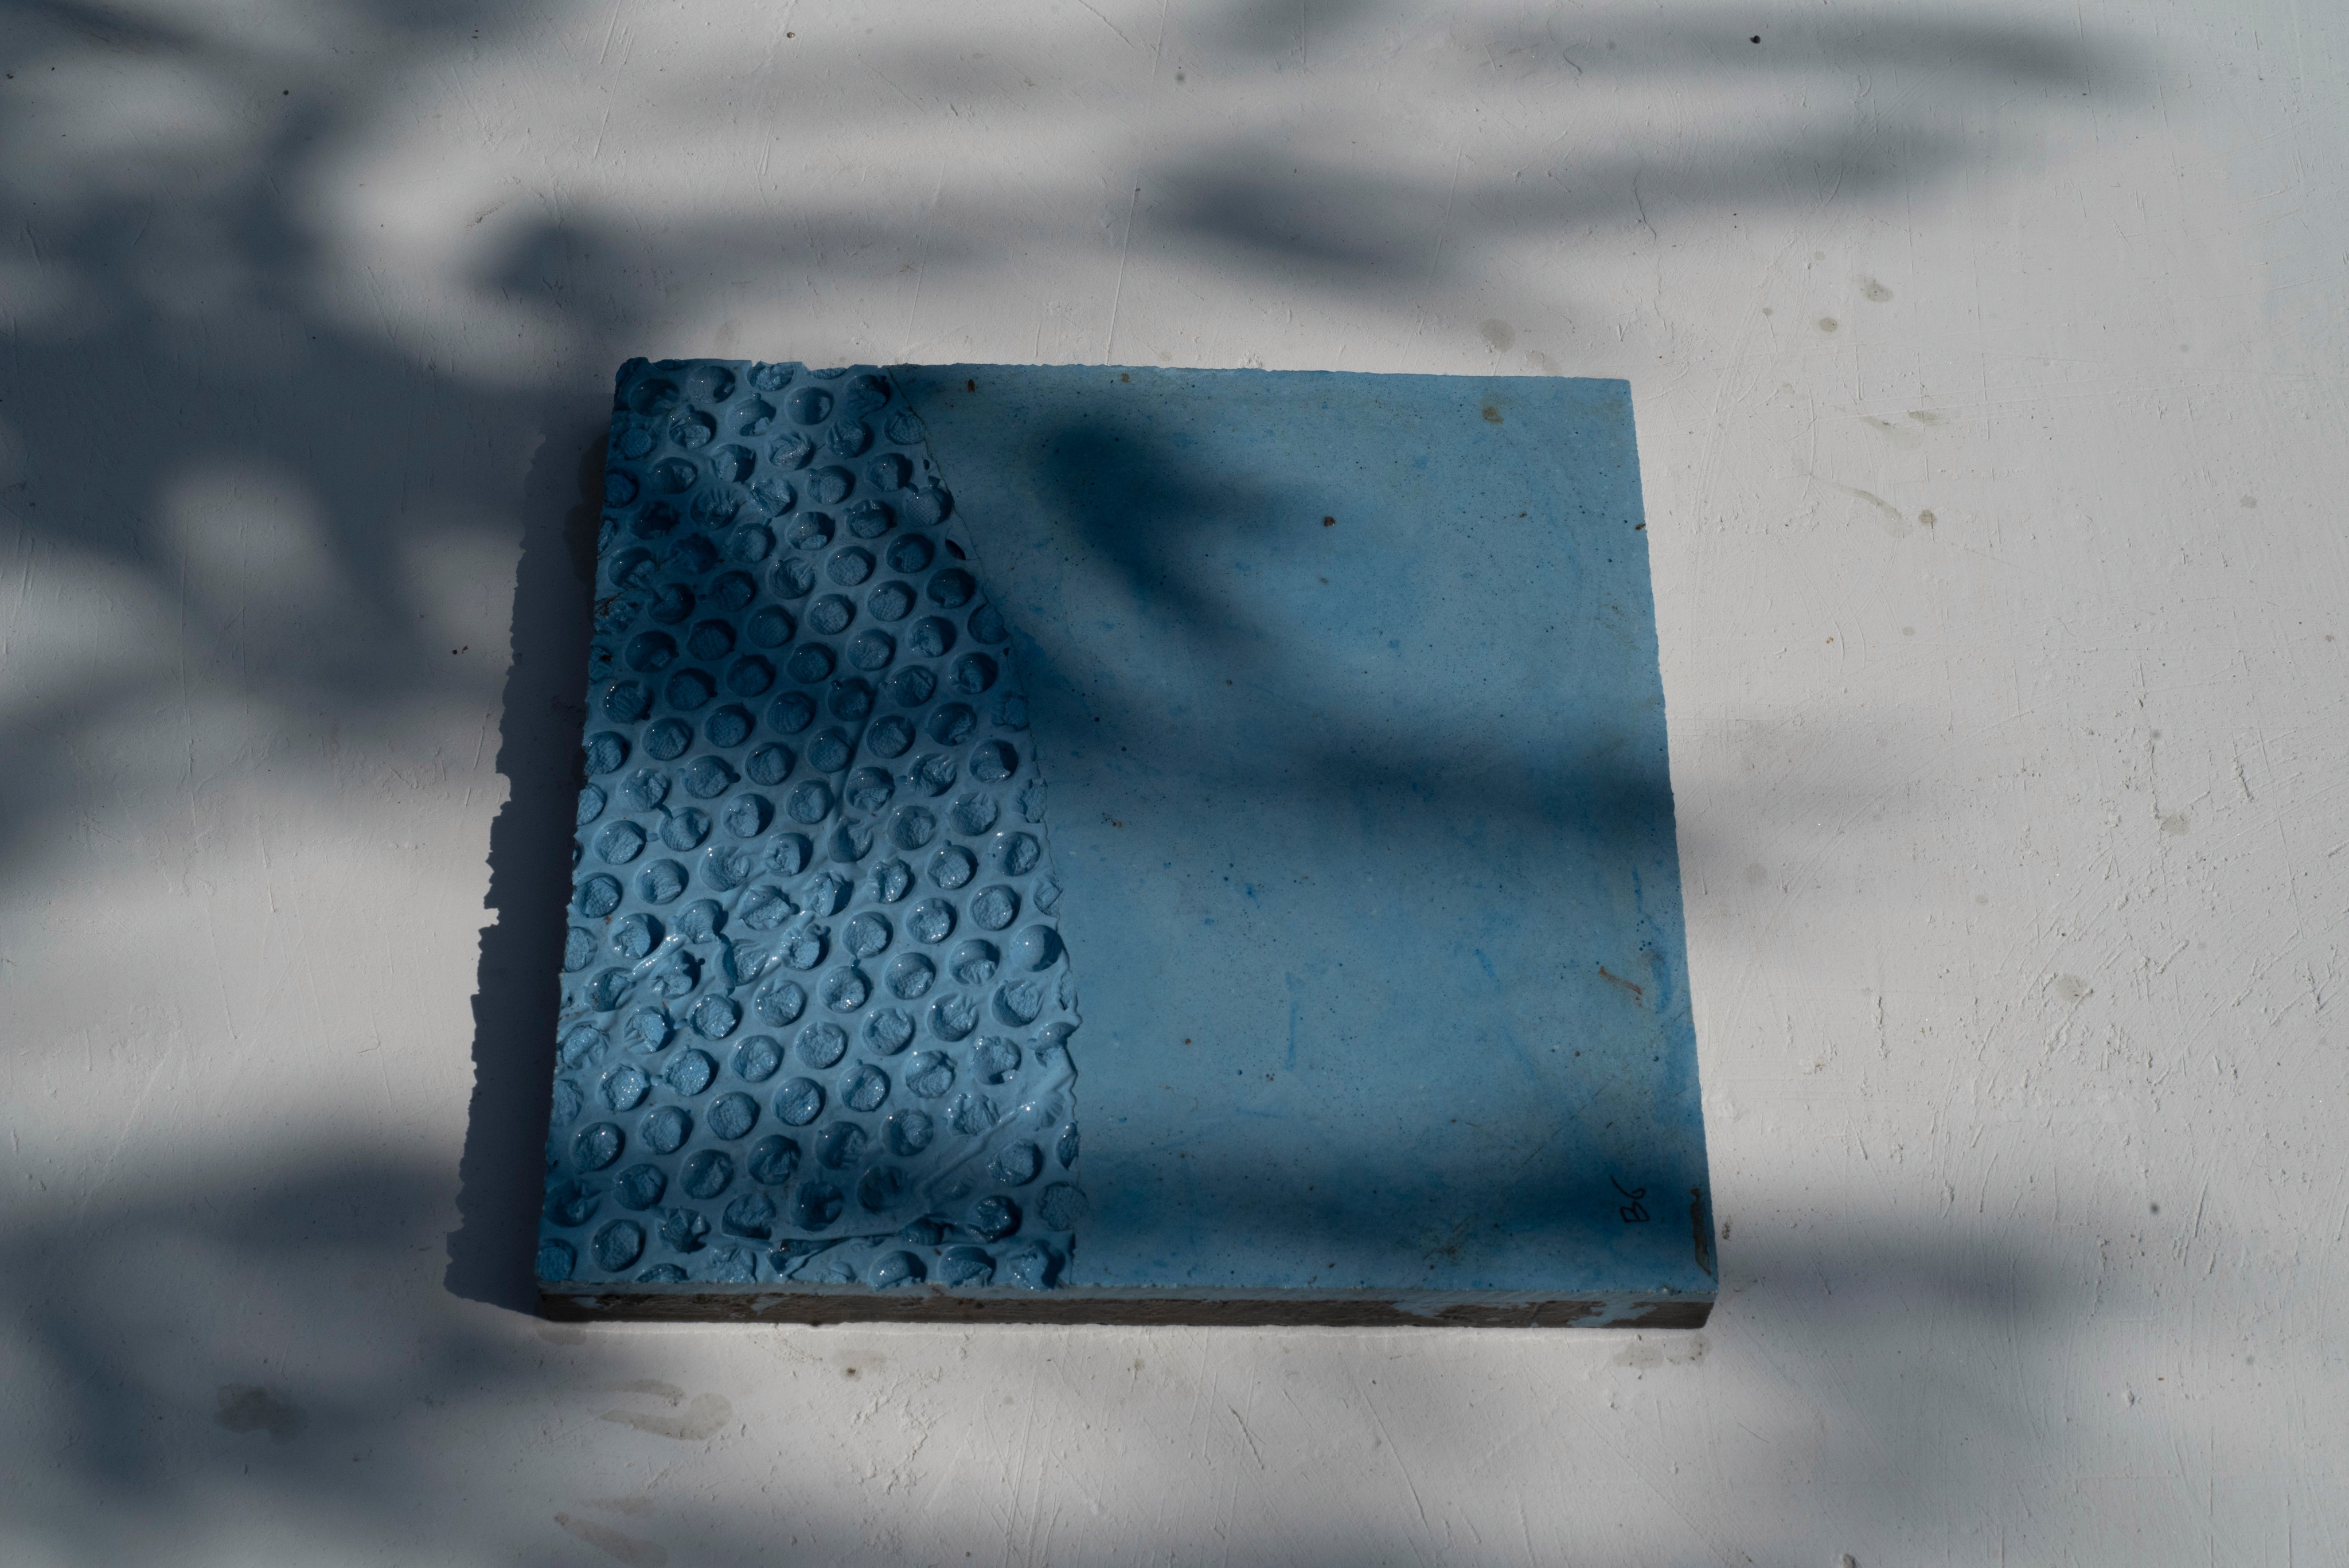
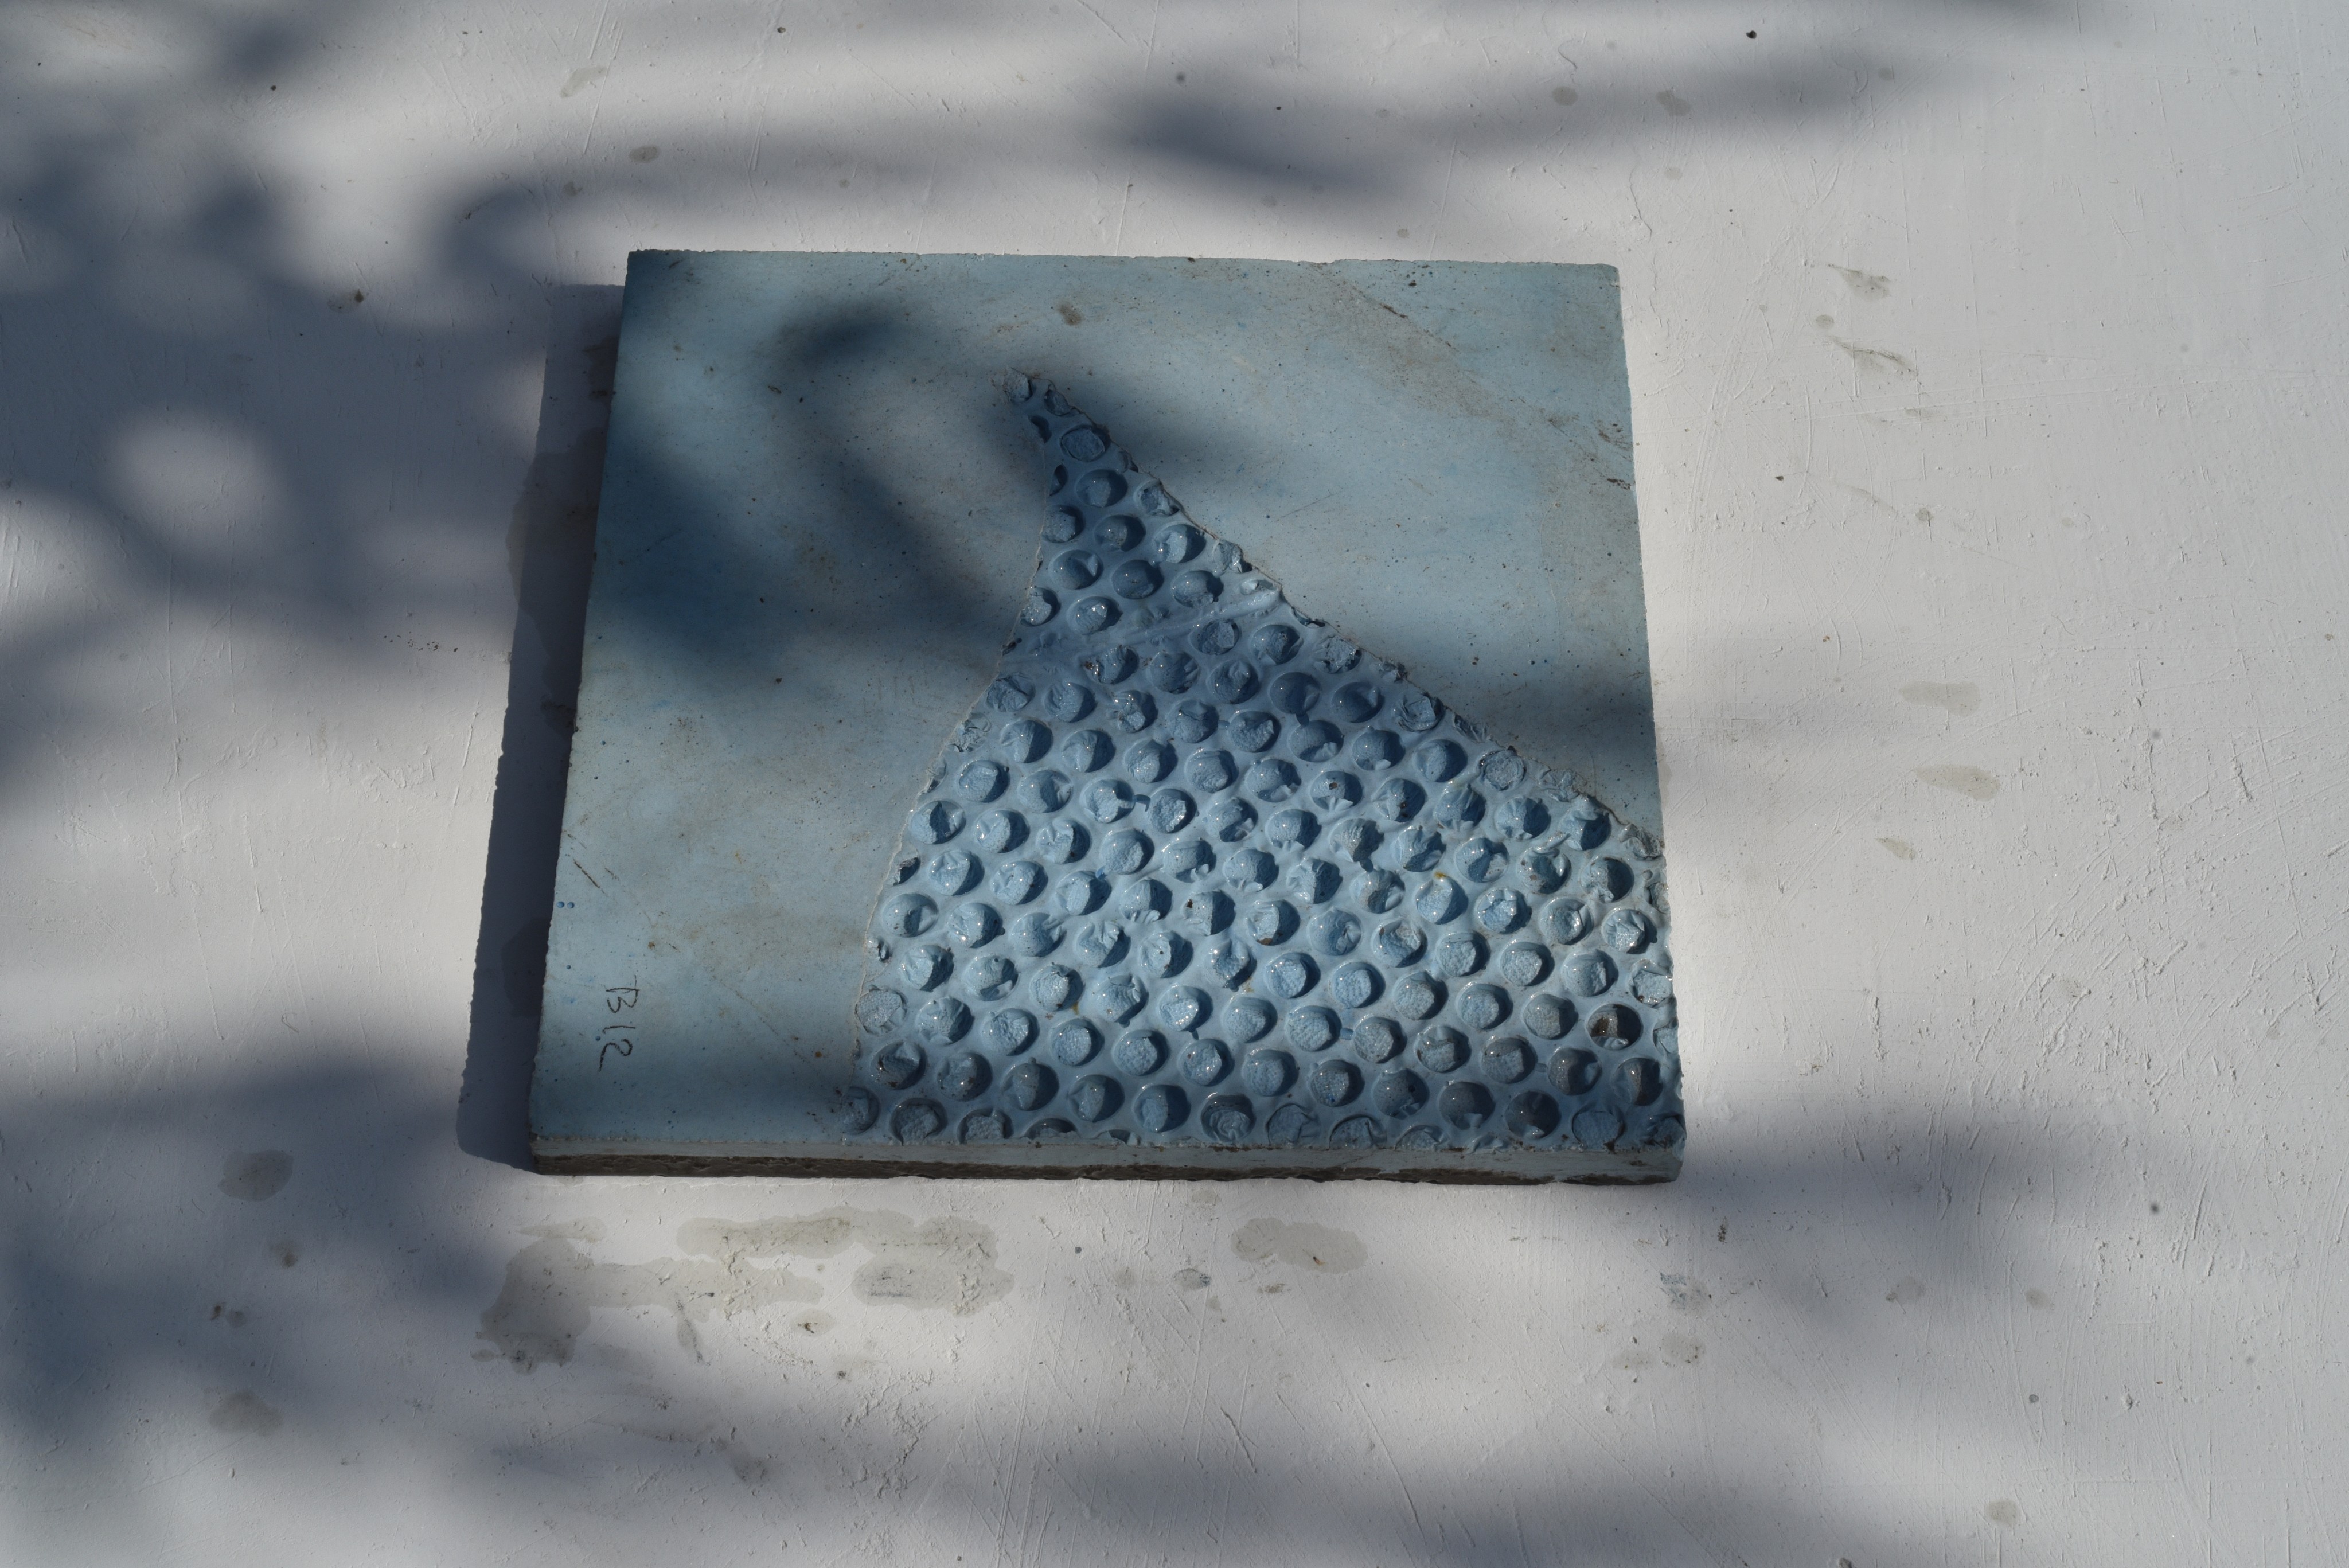
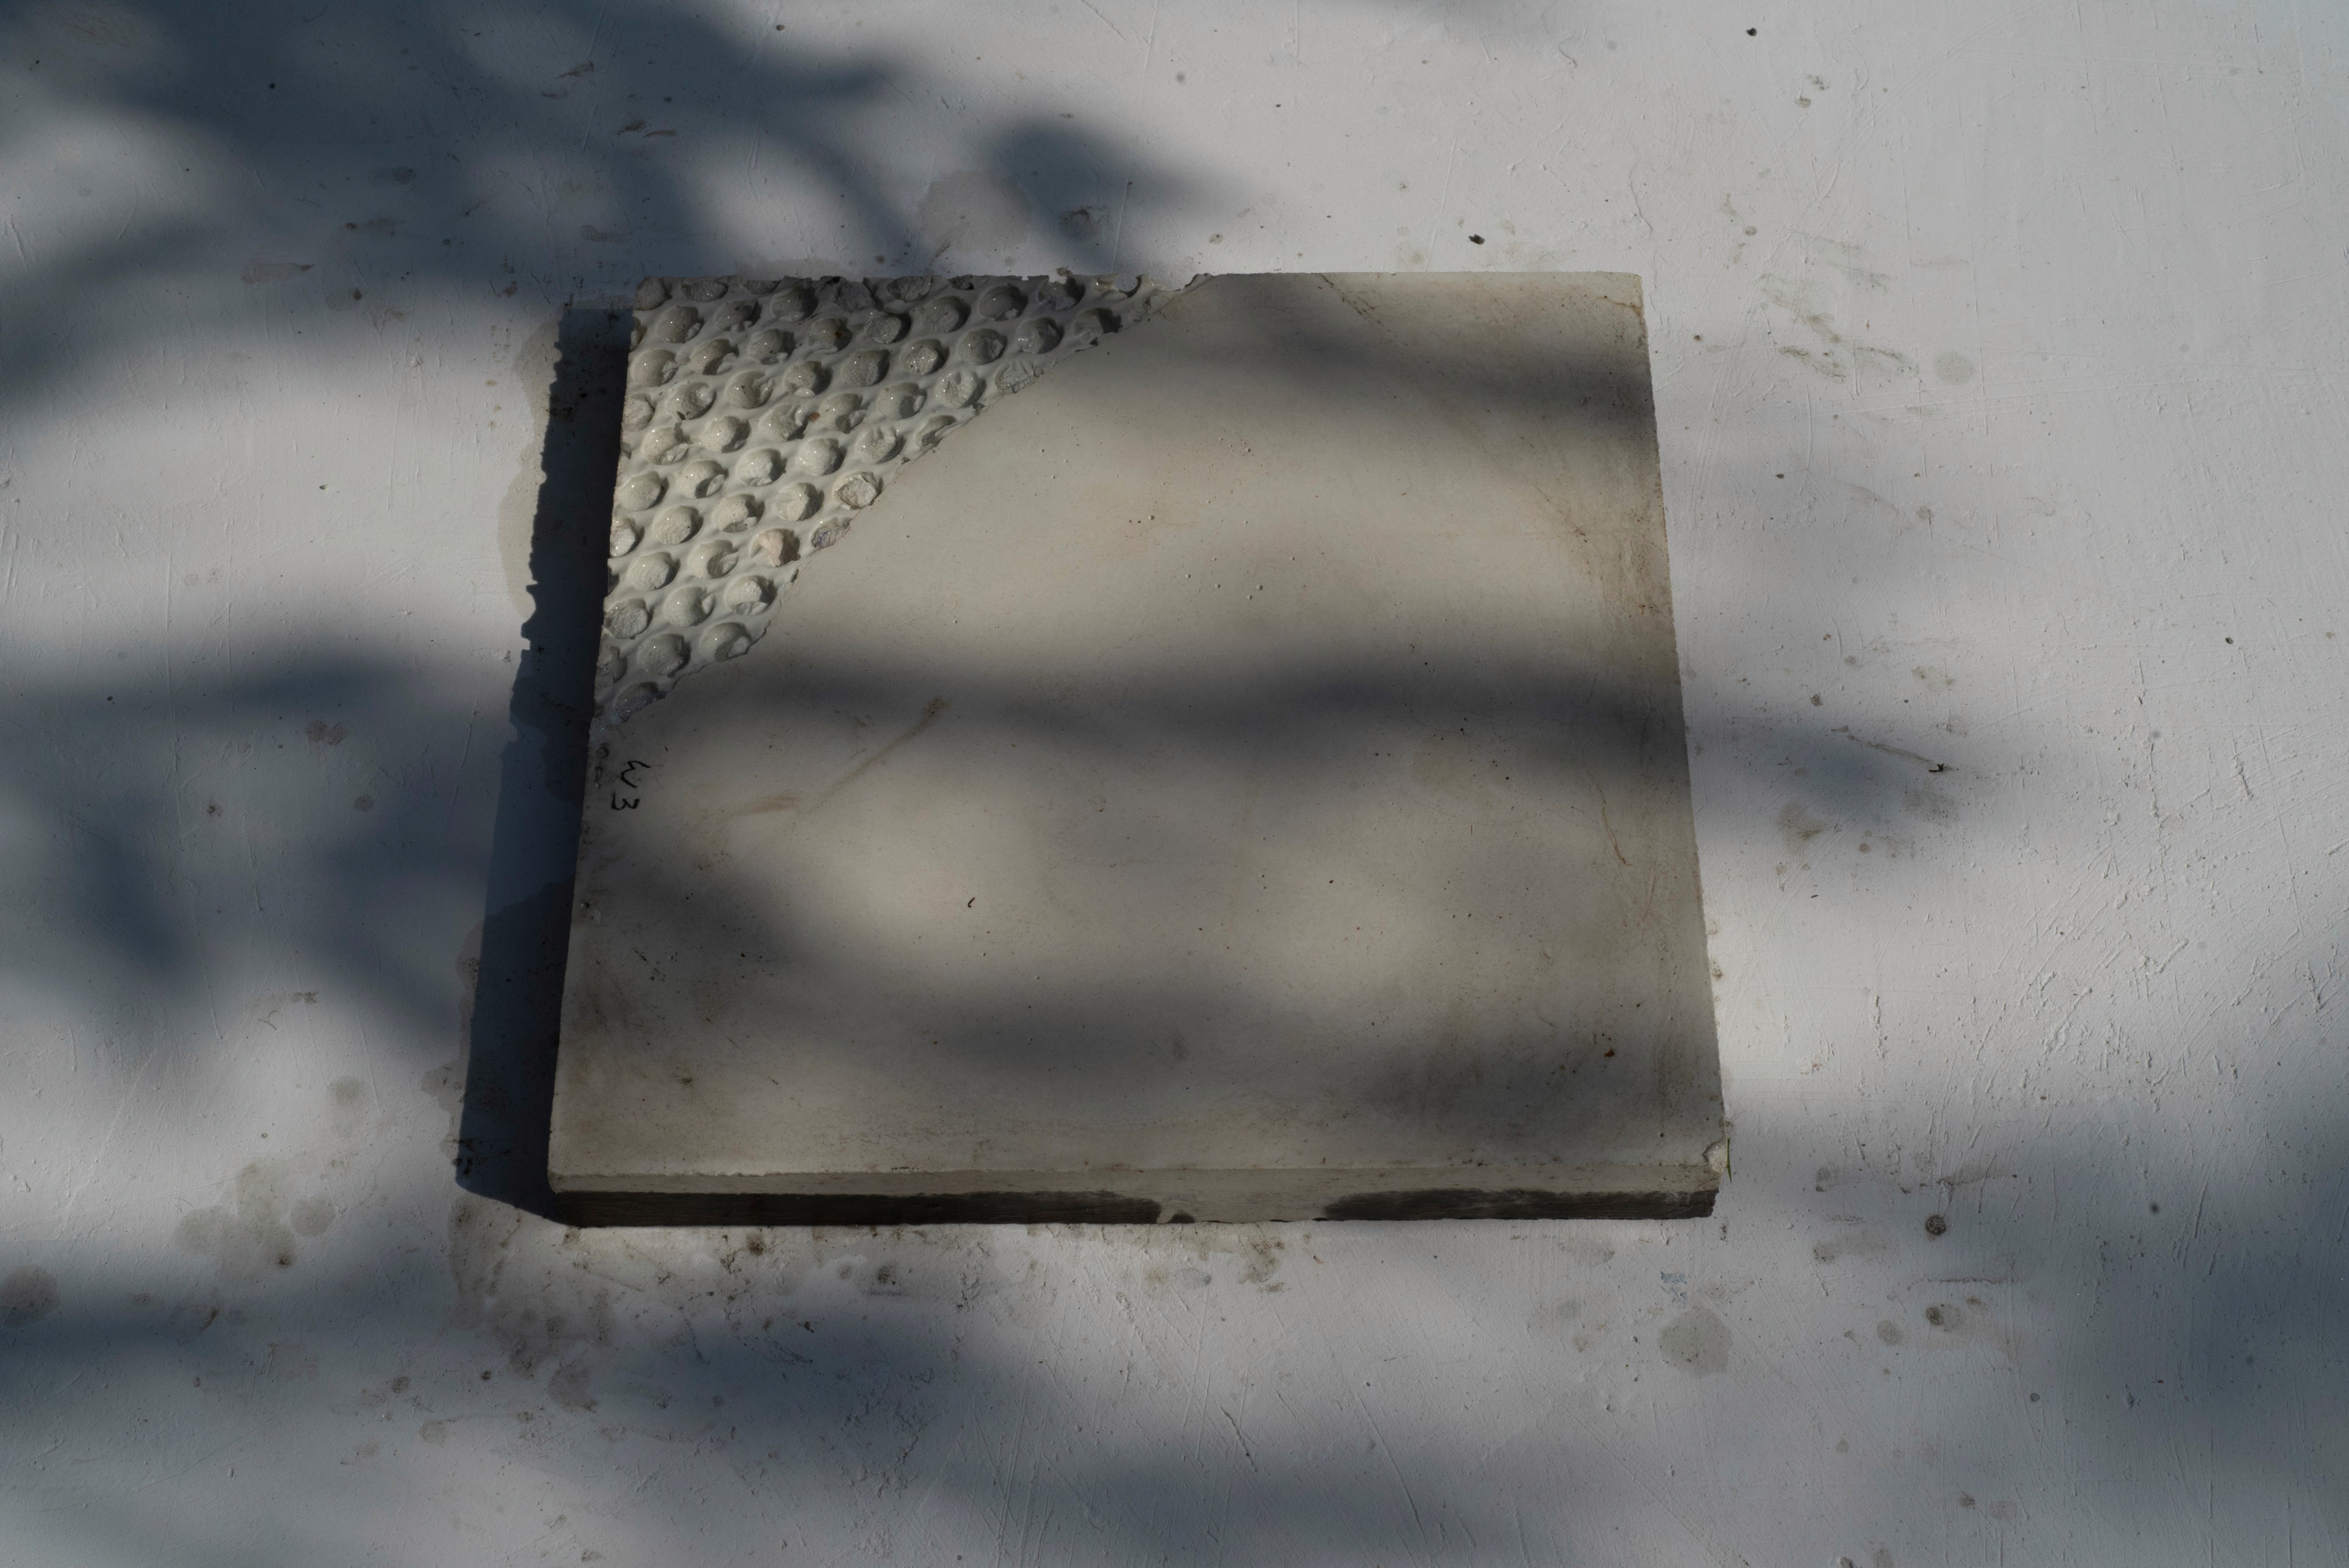
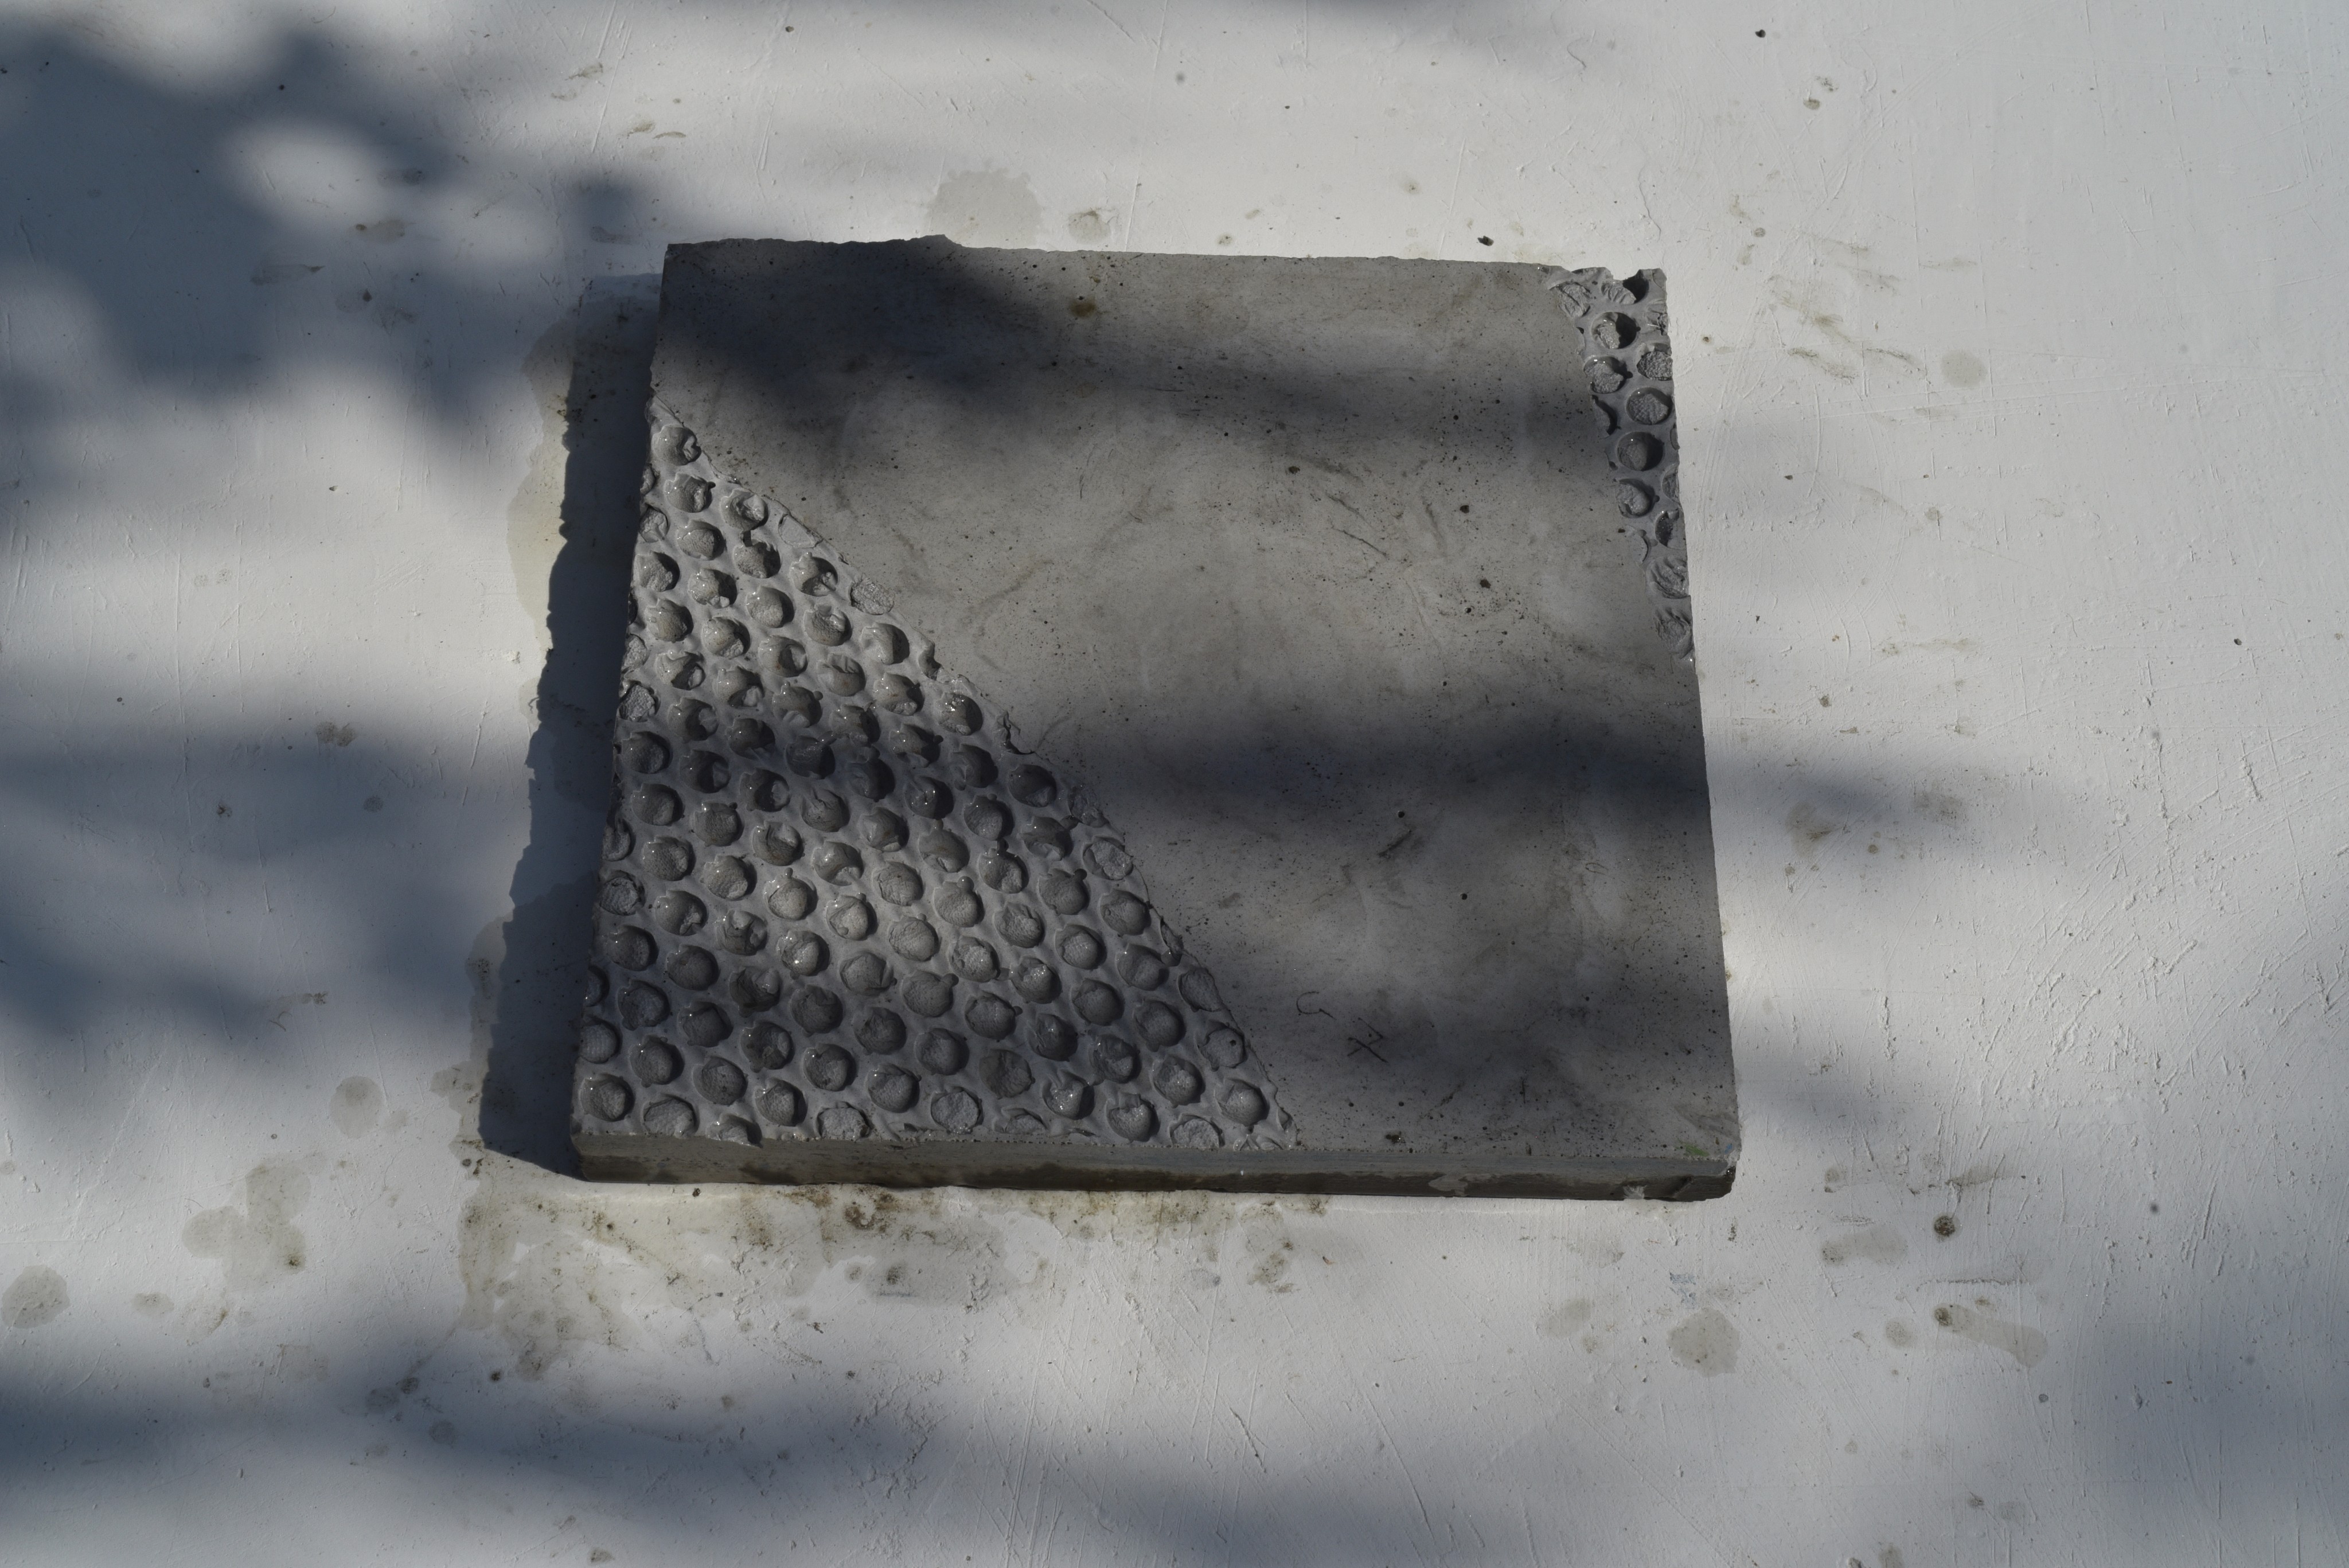
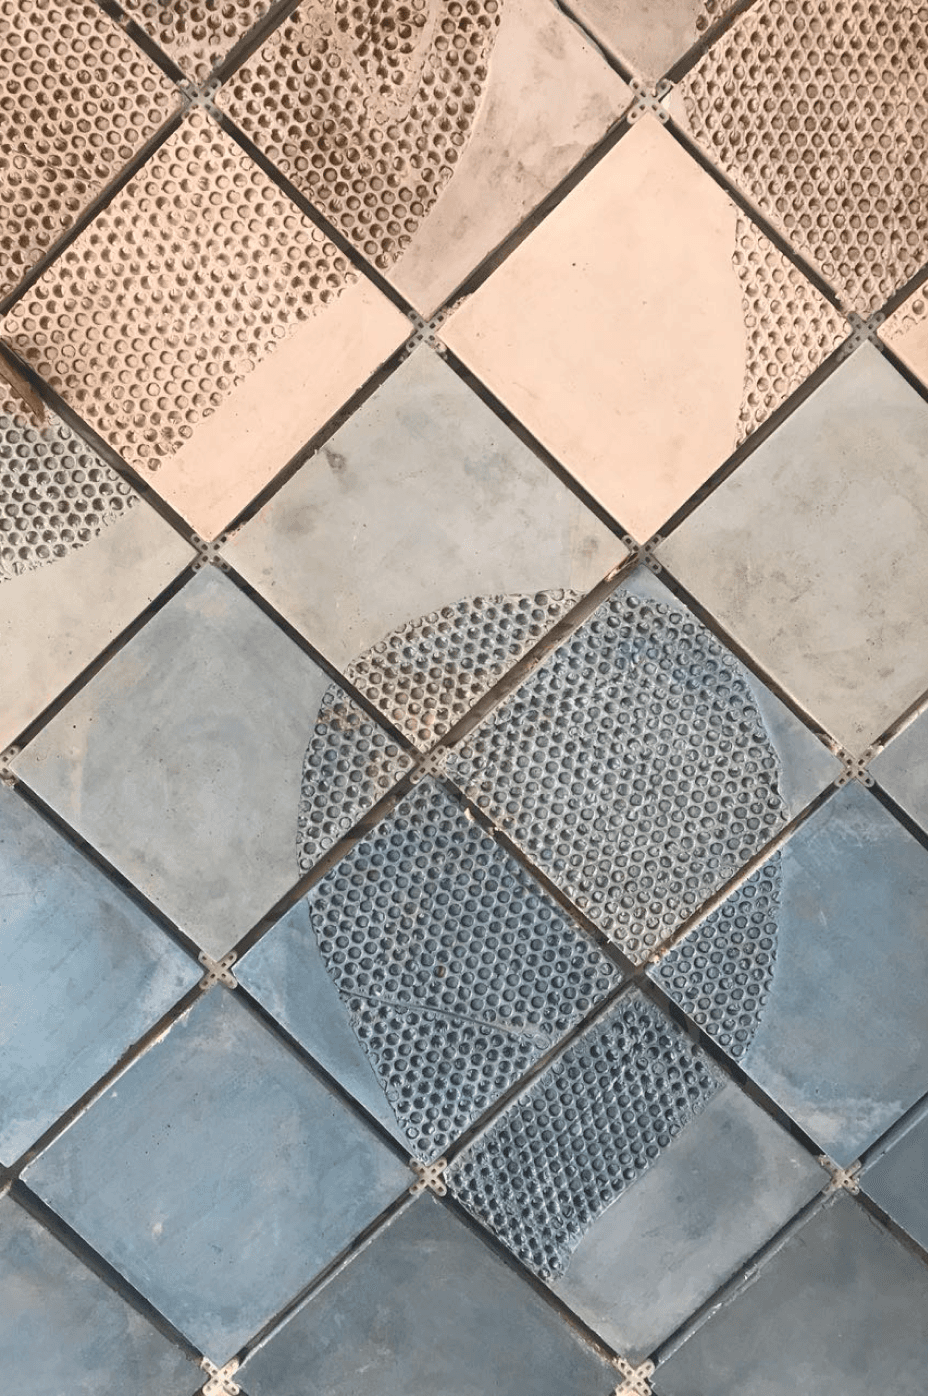
Pattern exploration through bubble wrap and sand casting
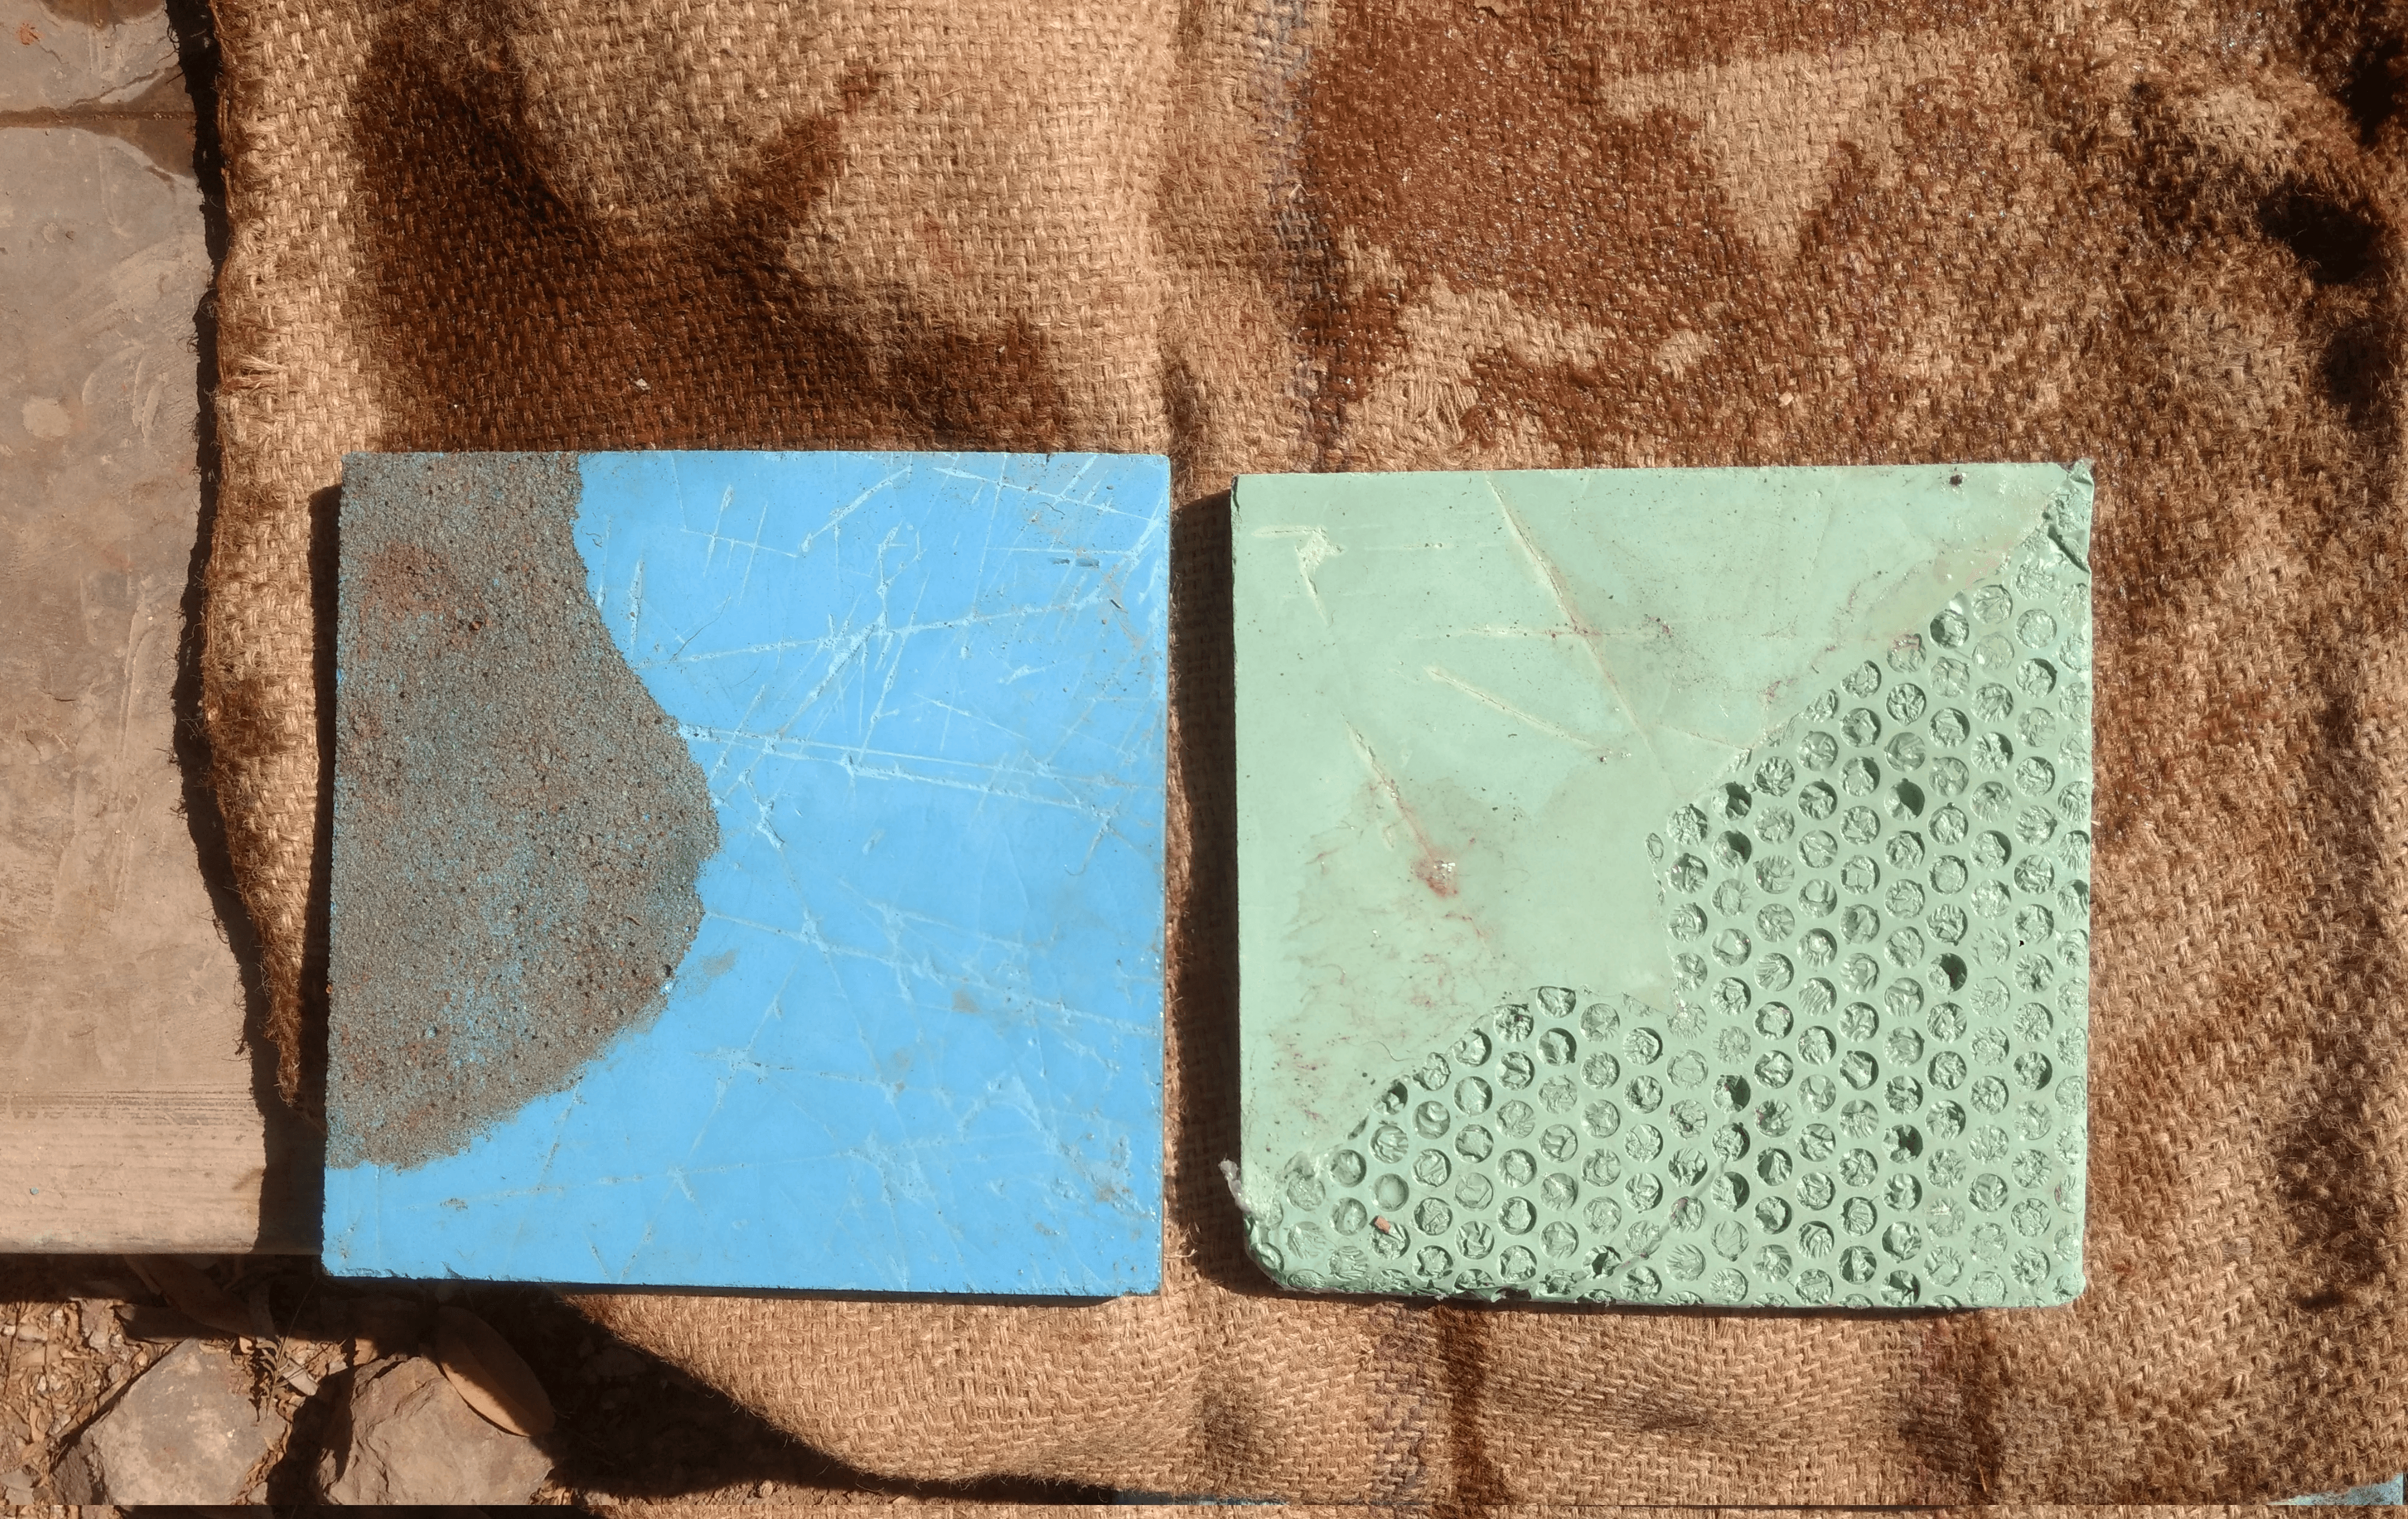
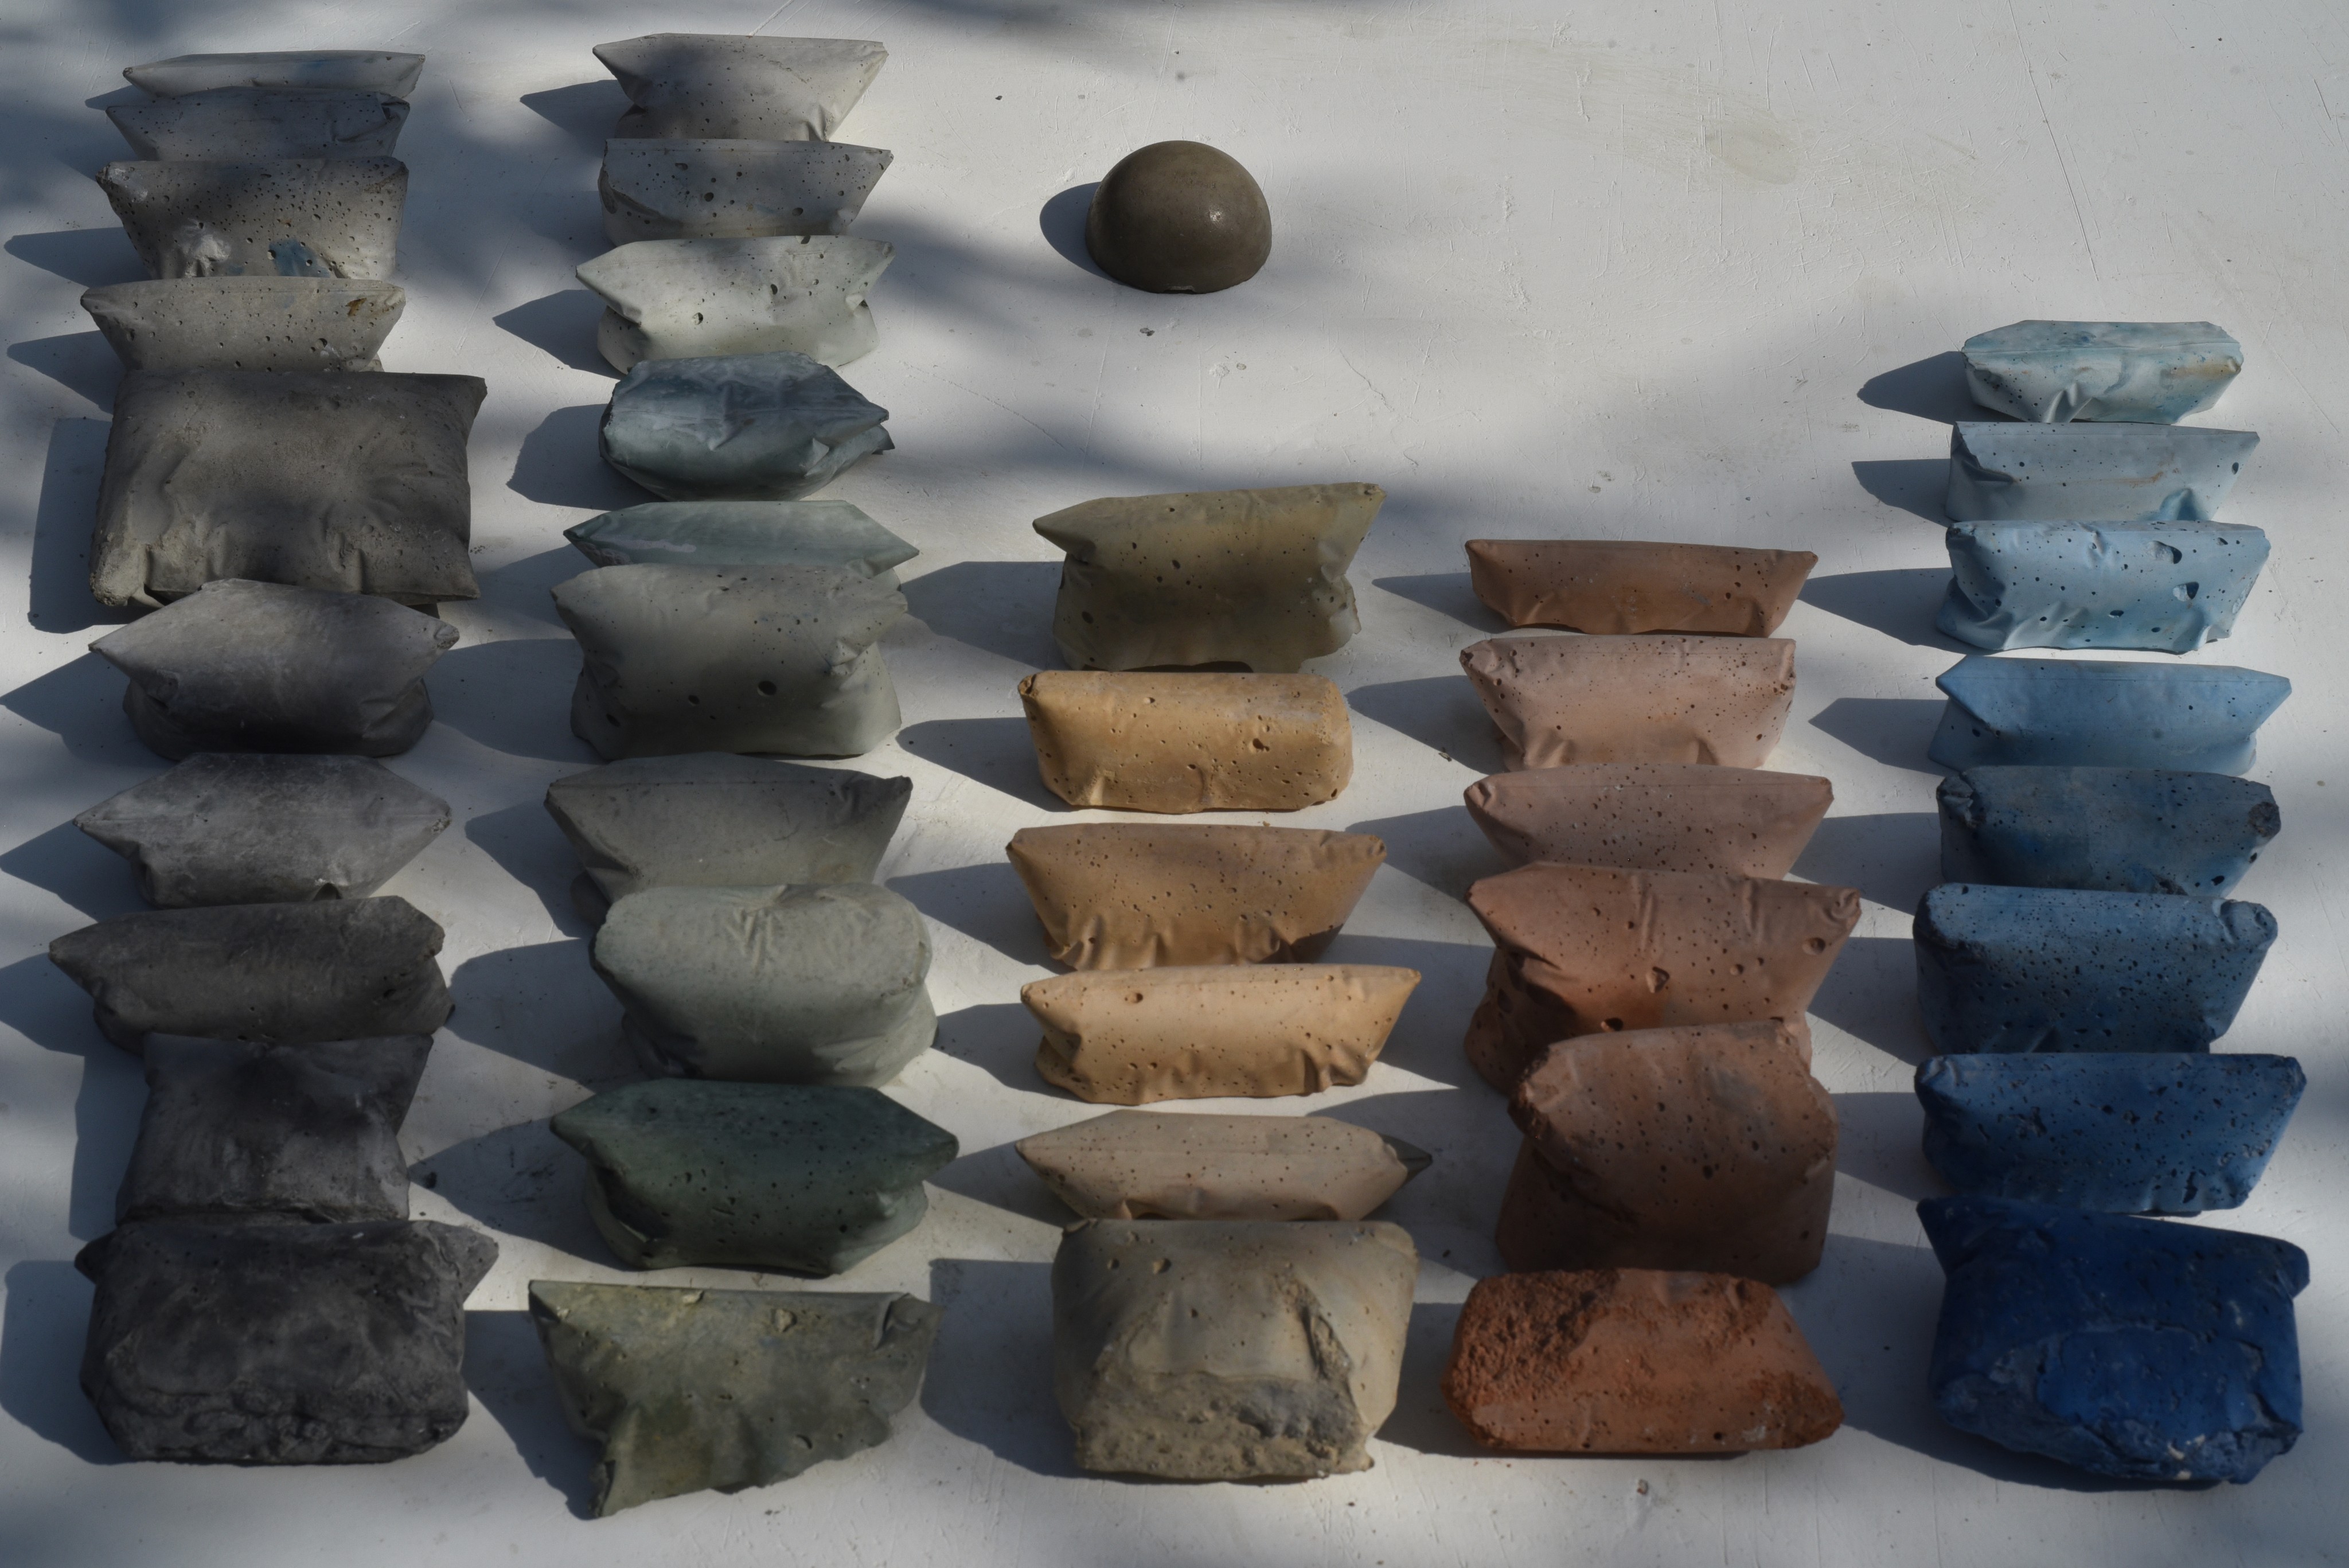
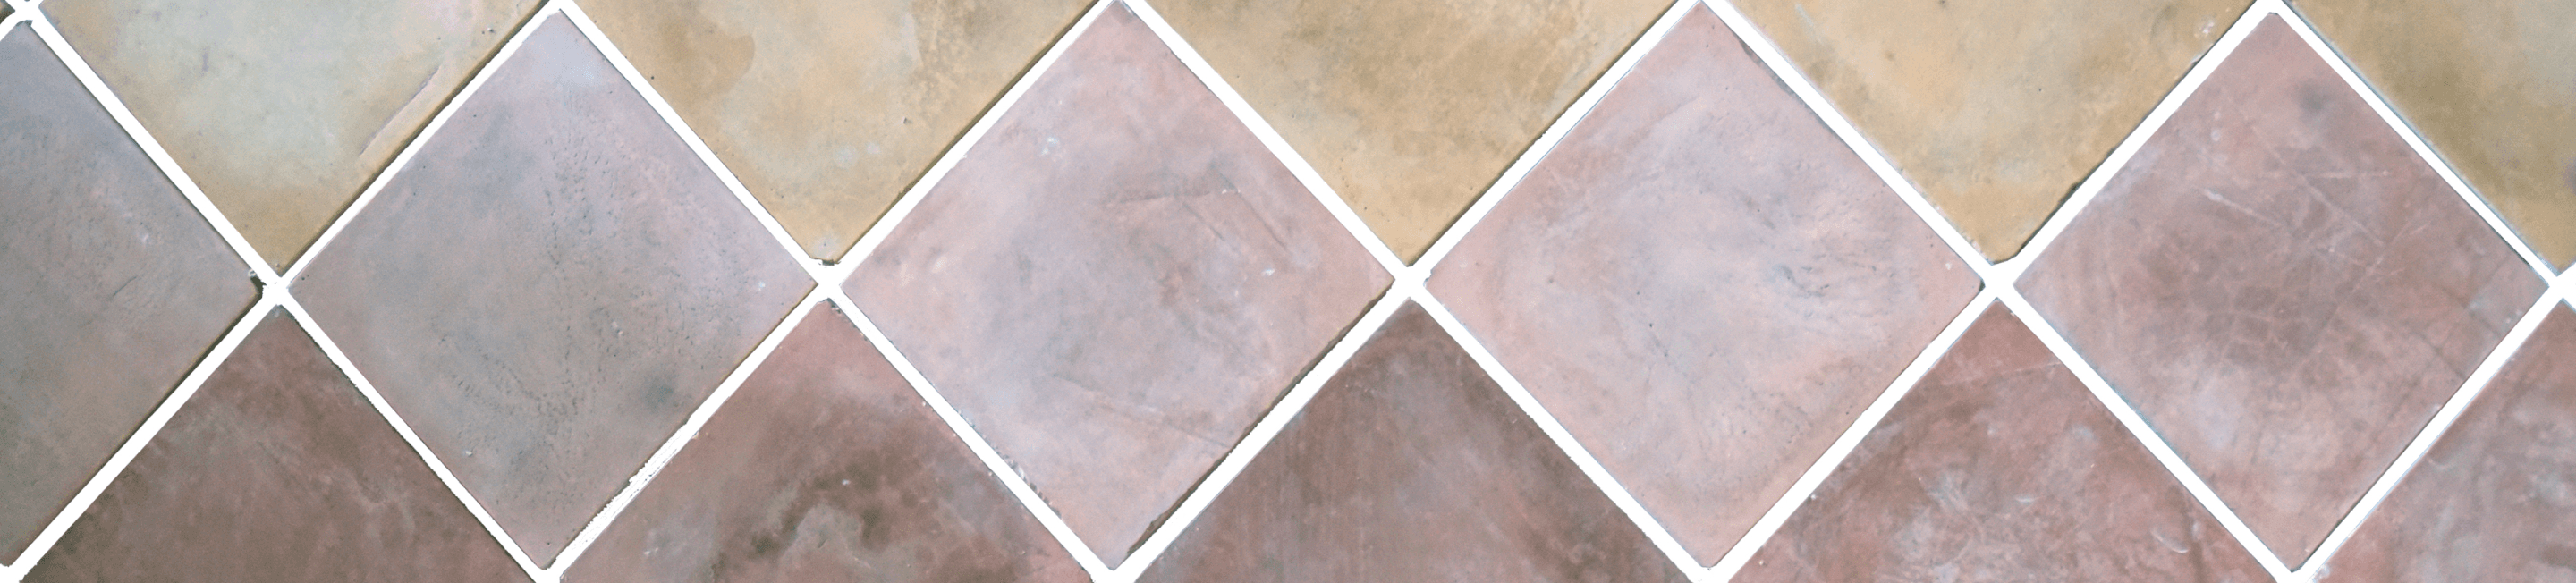
Different shades created from different proportion of the oxide and mixing it with white or gray cement based on required shade
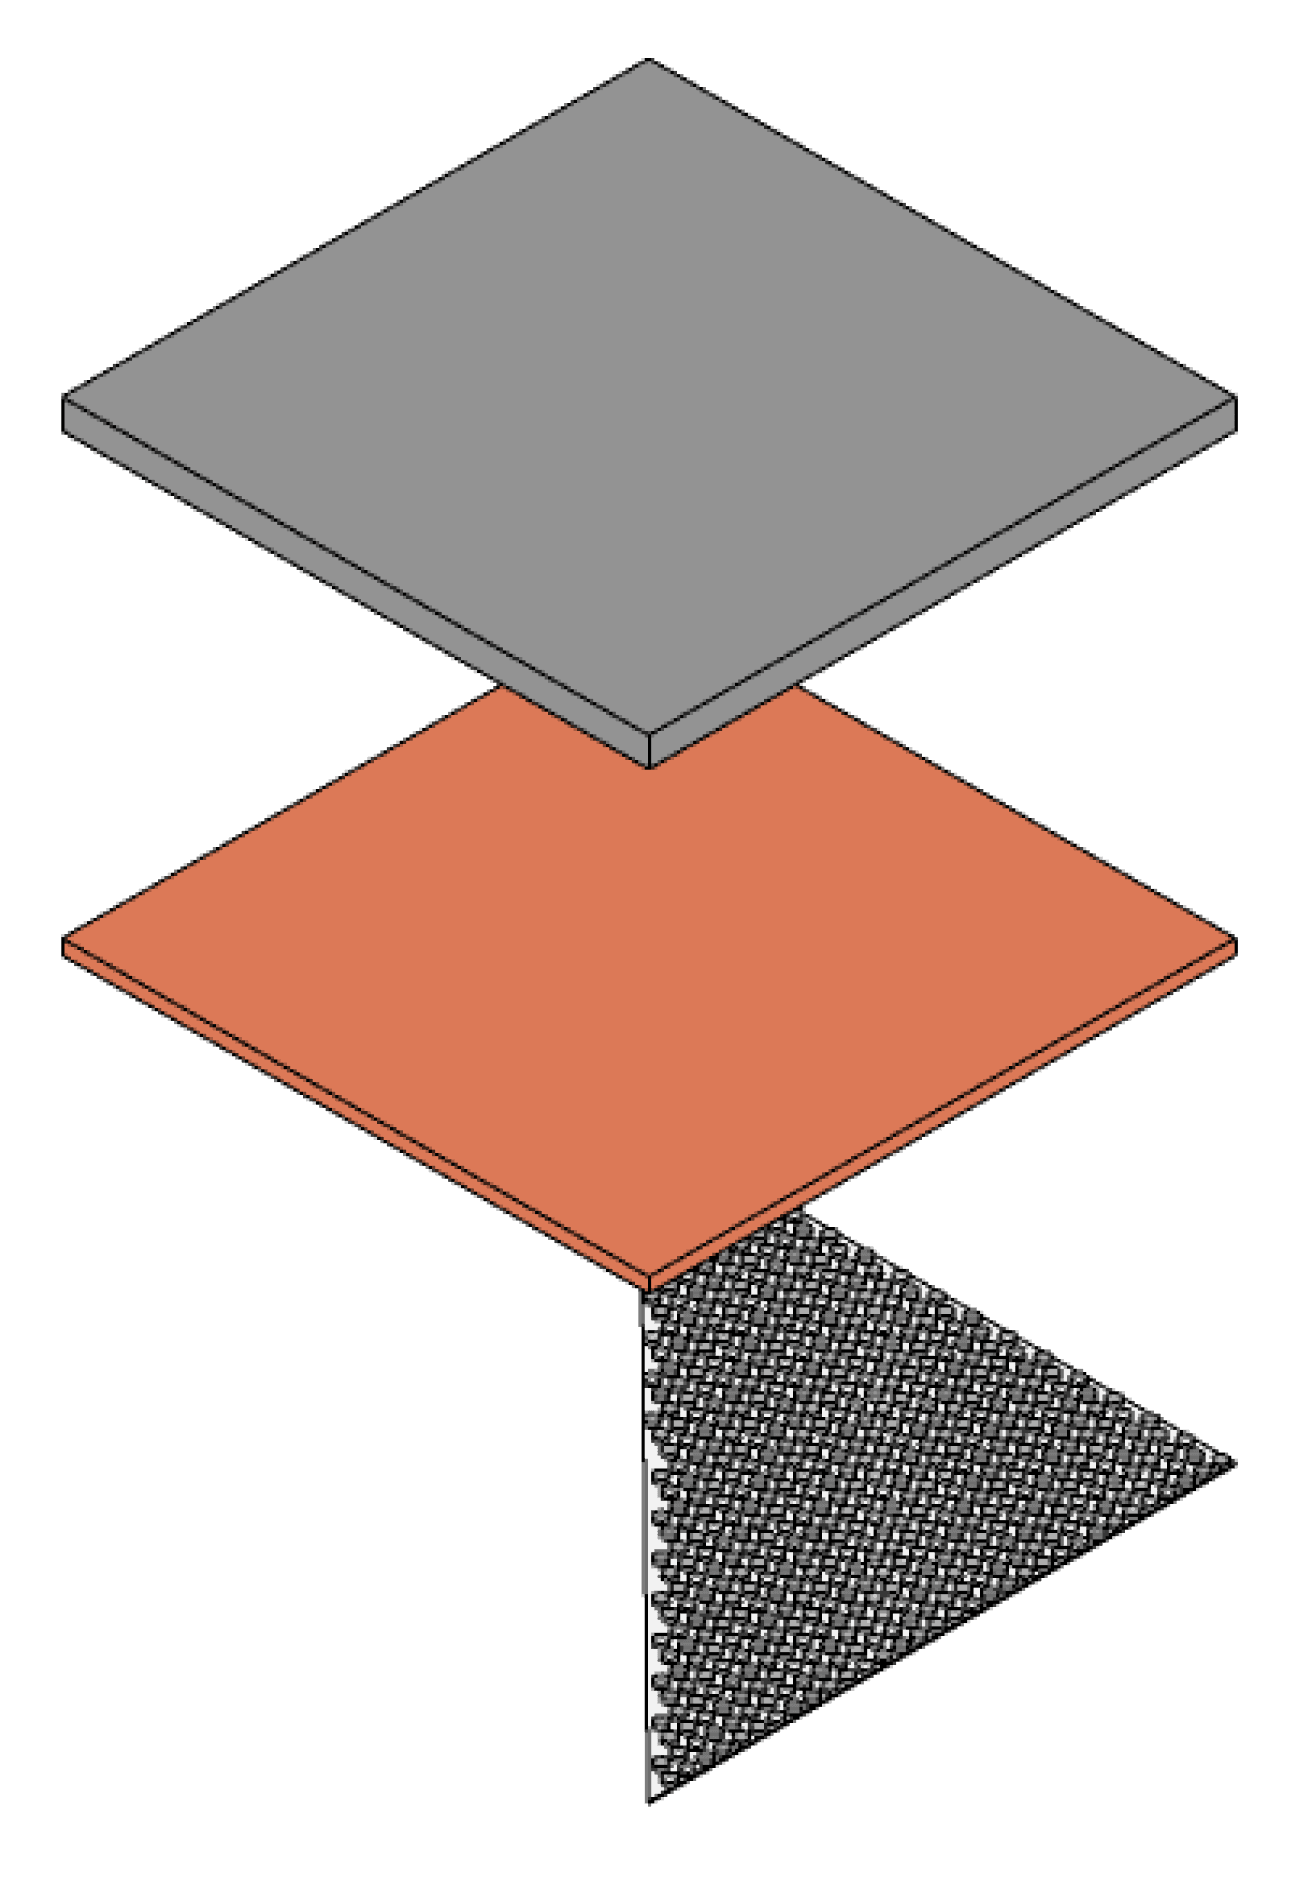
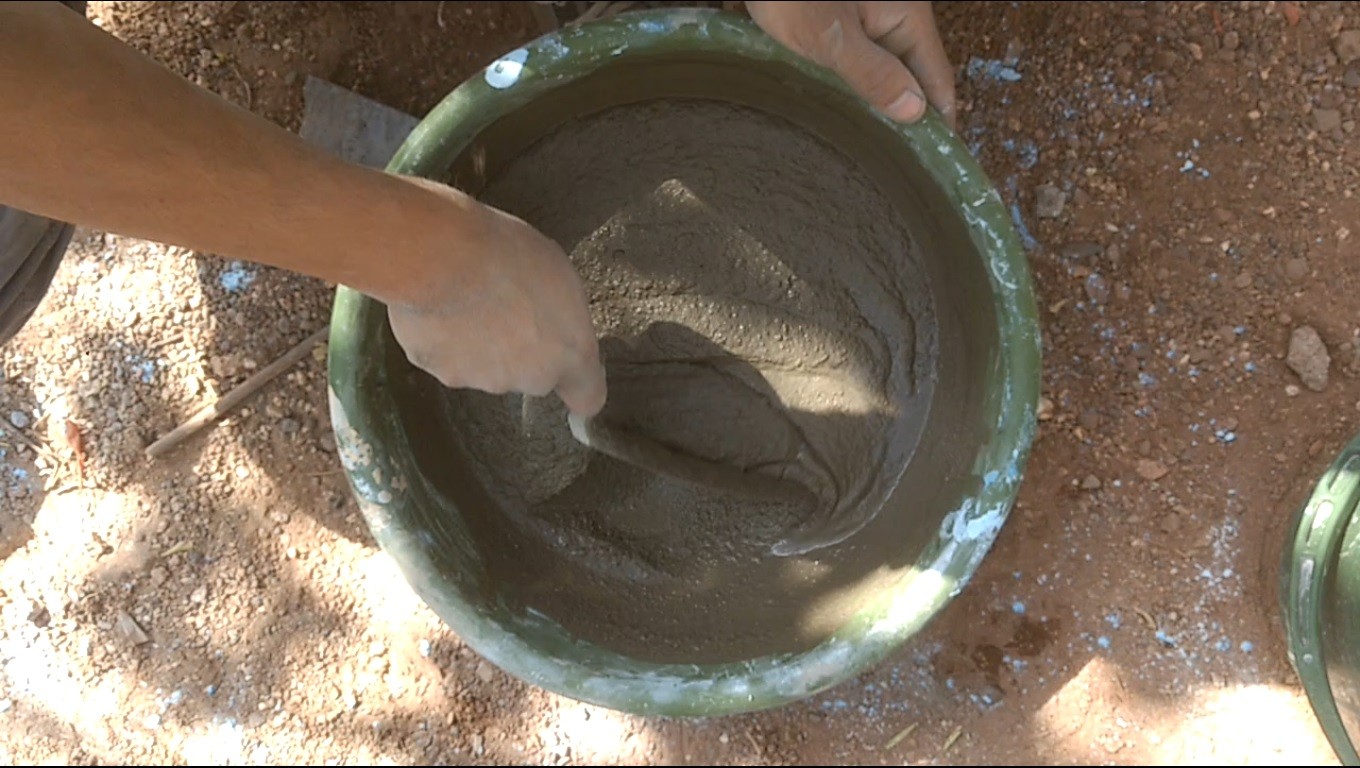
Mortar
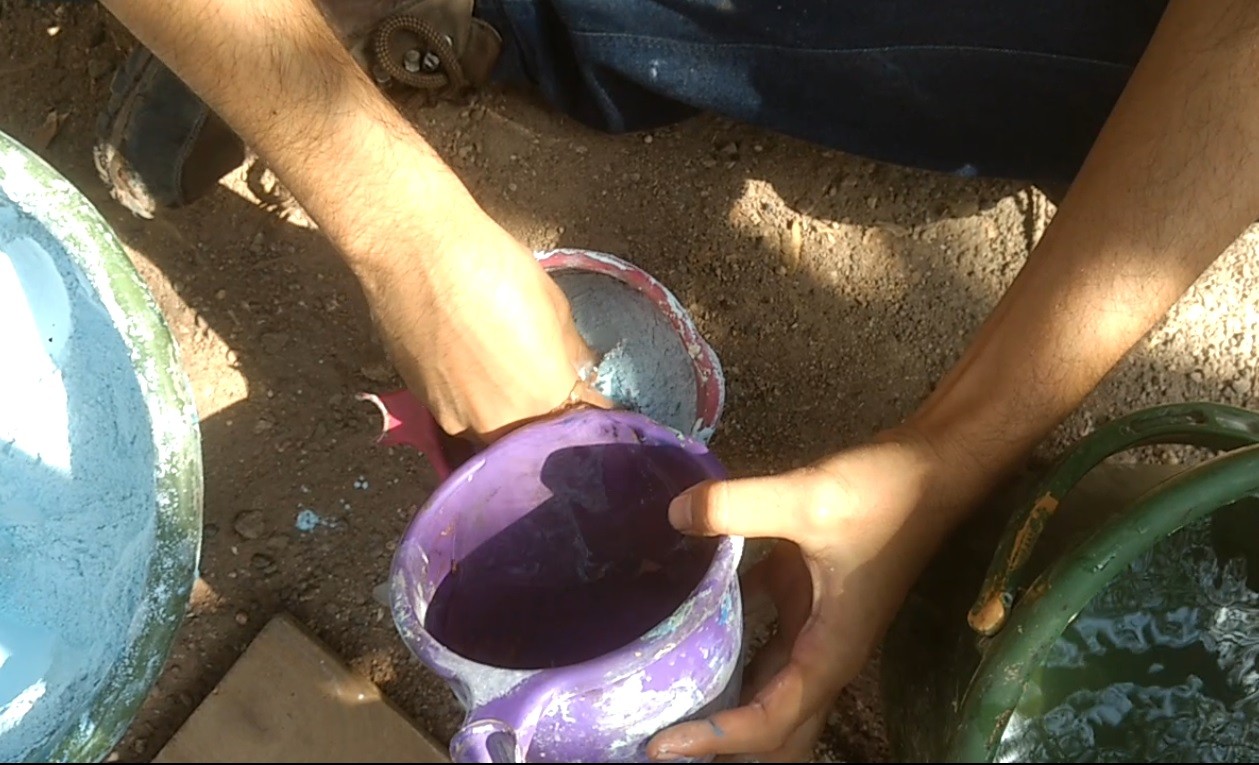
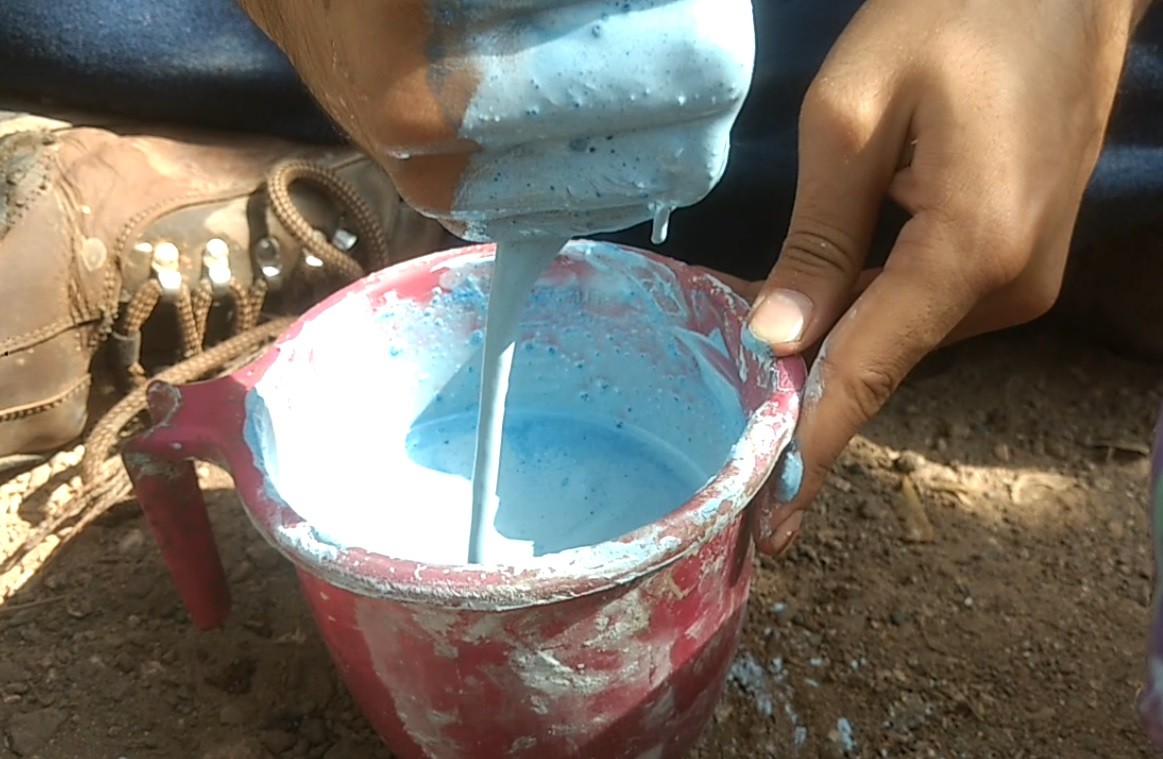
Cement Slurry with
pigmented oxide
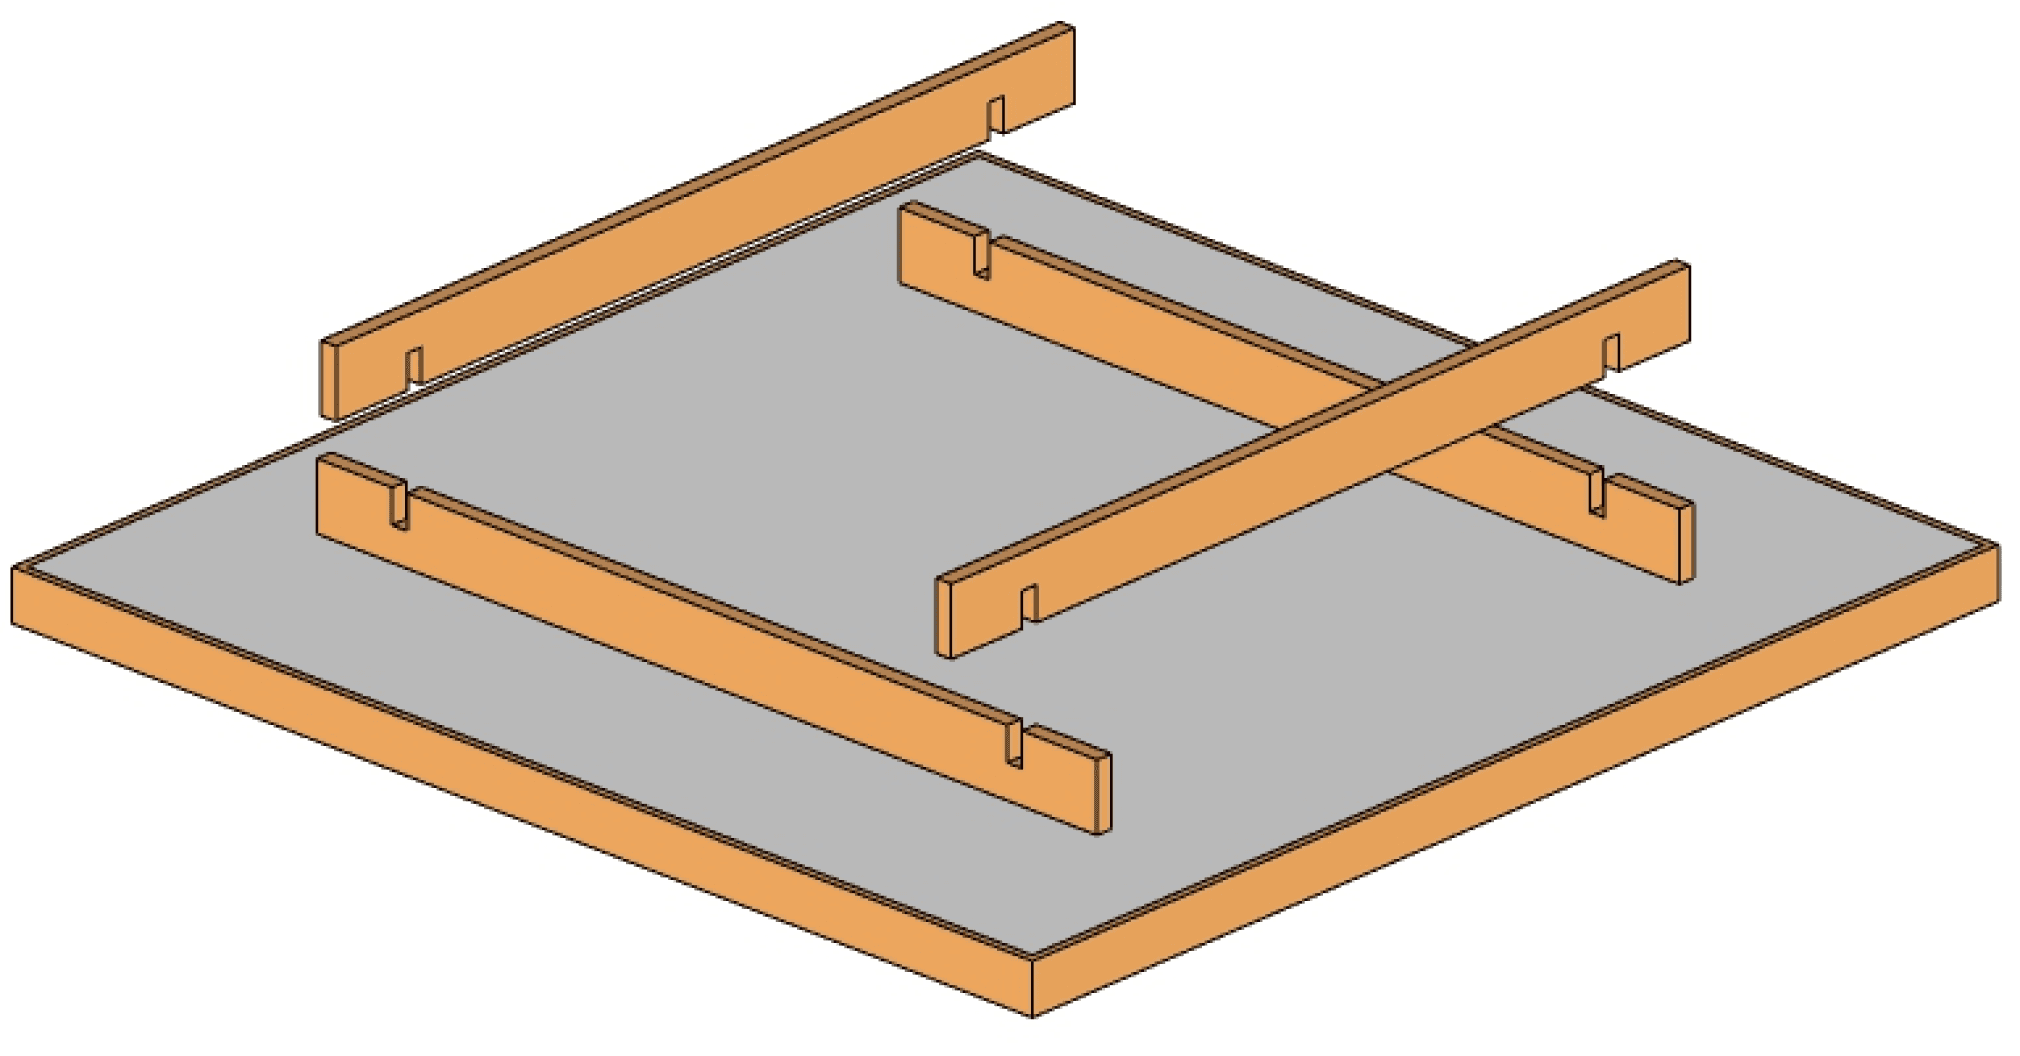
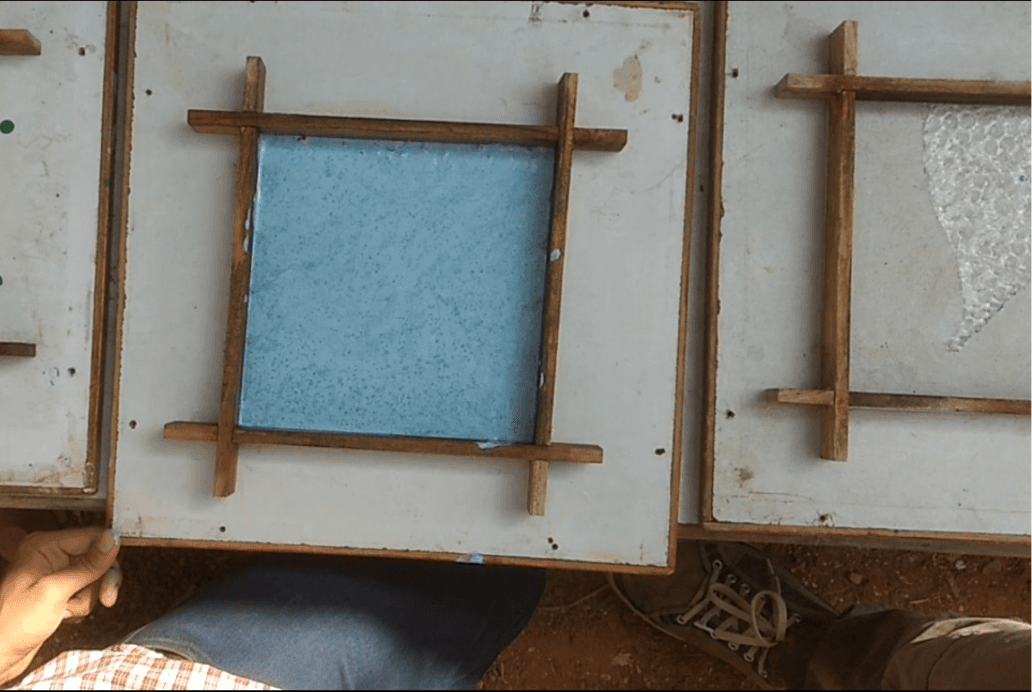
Wooden Frame
Wooden Base
Rubber Glue
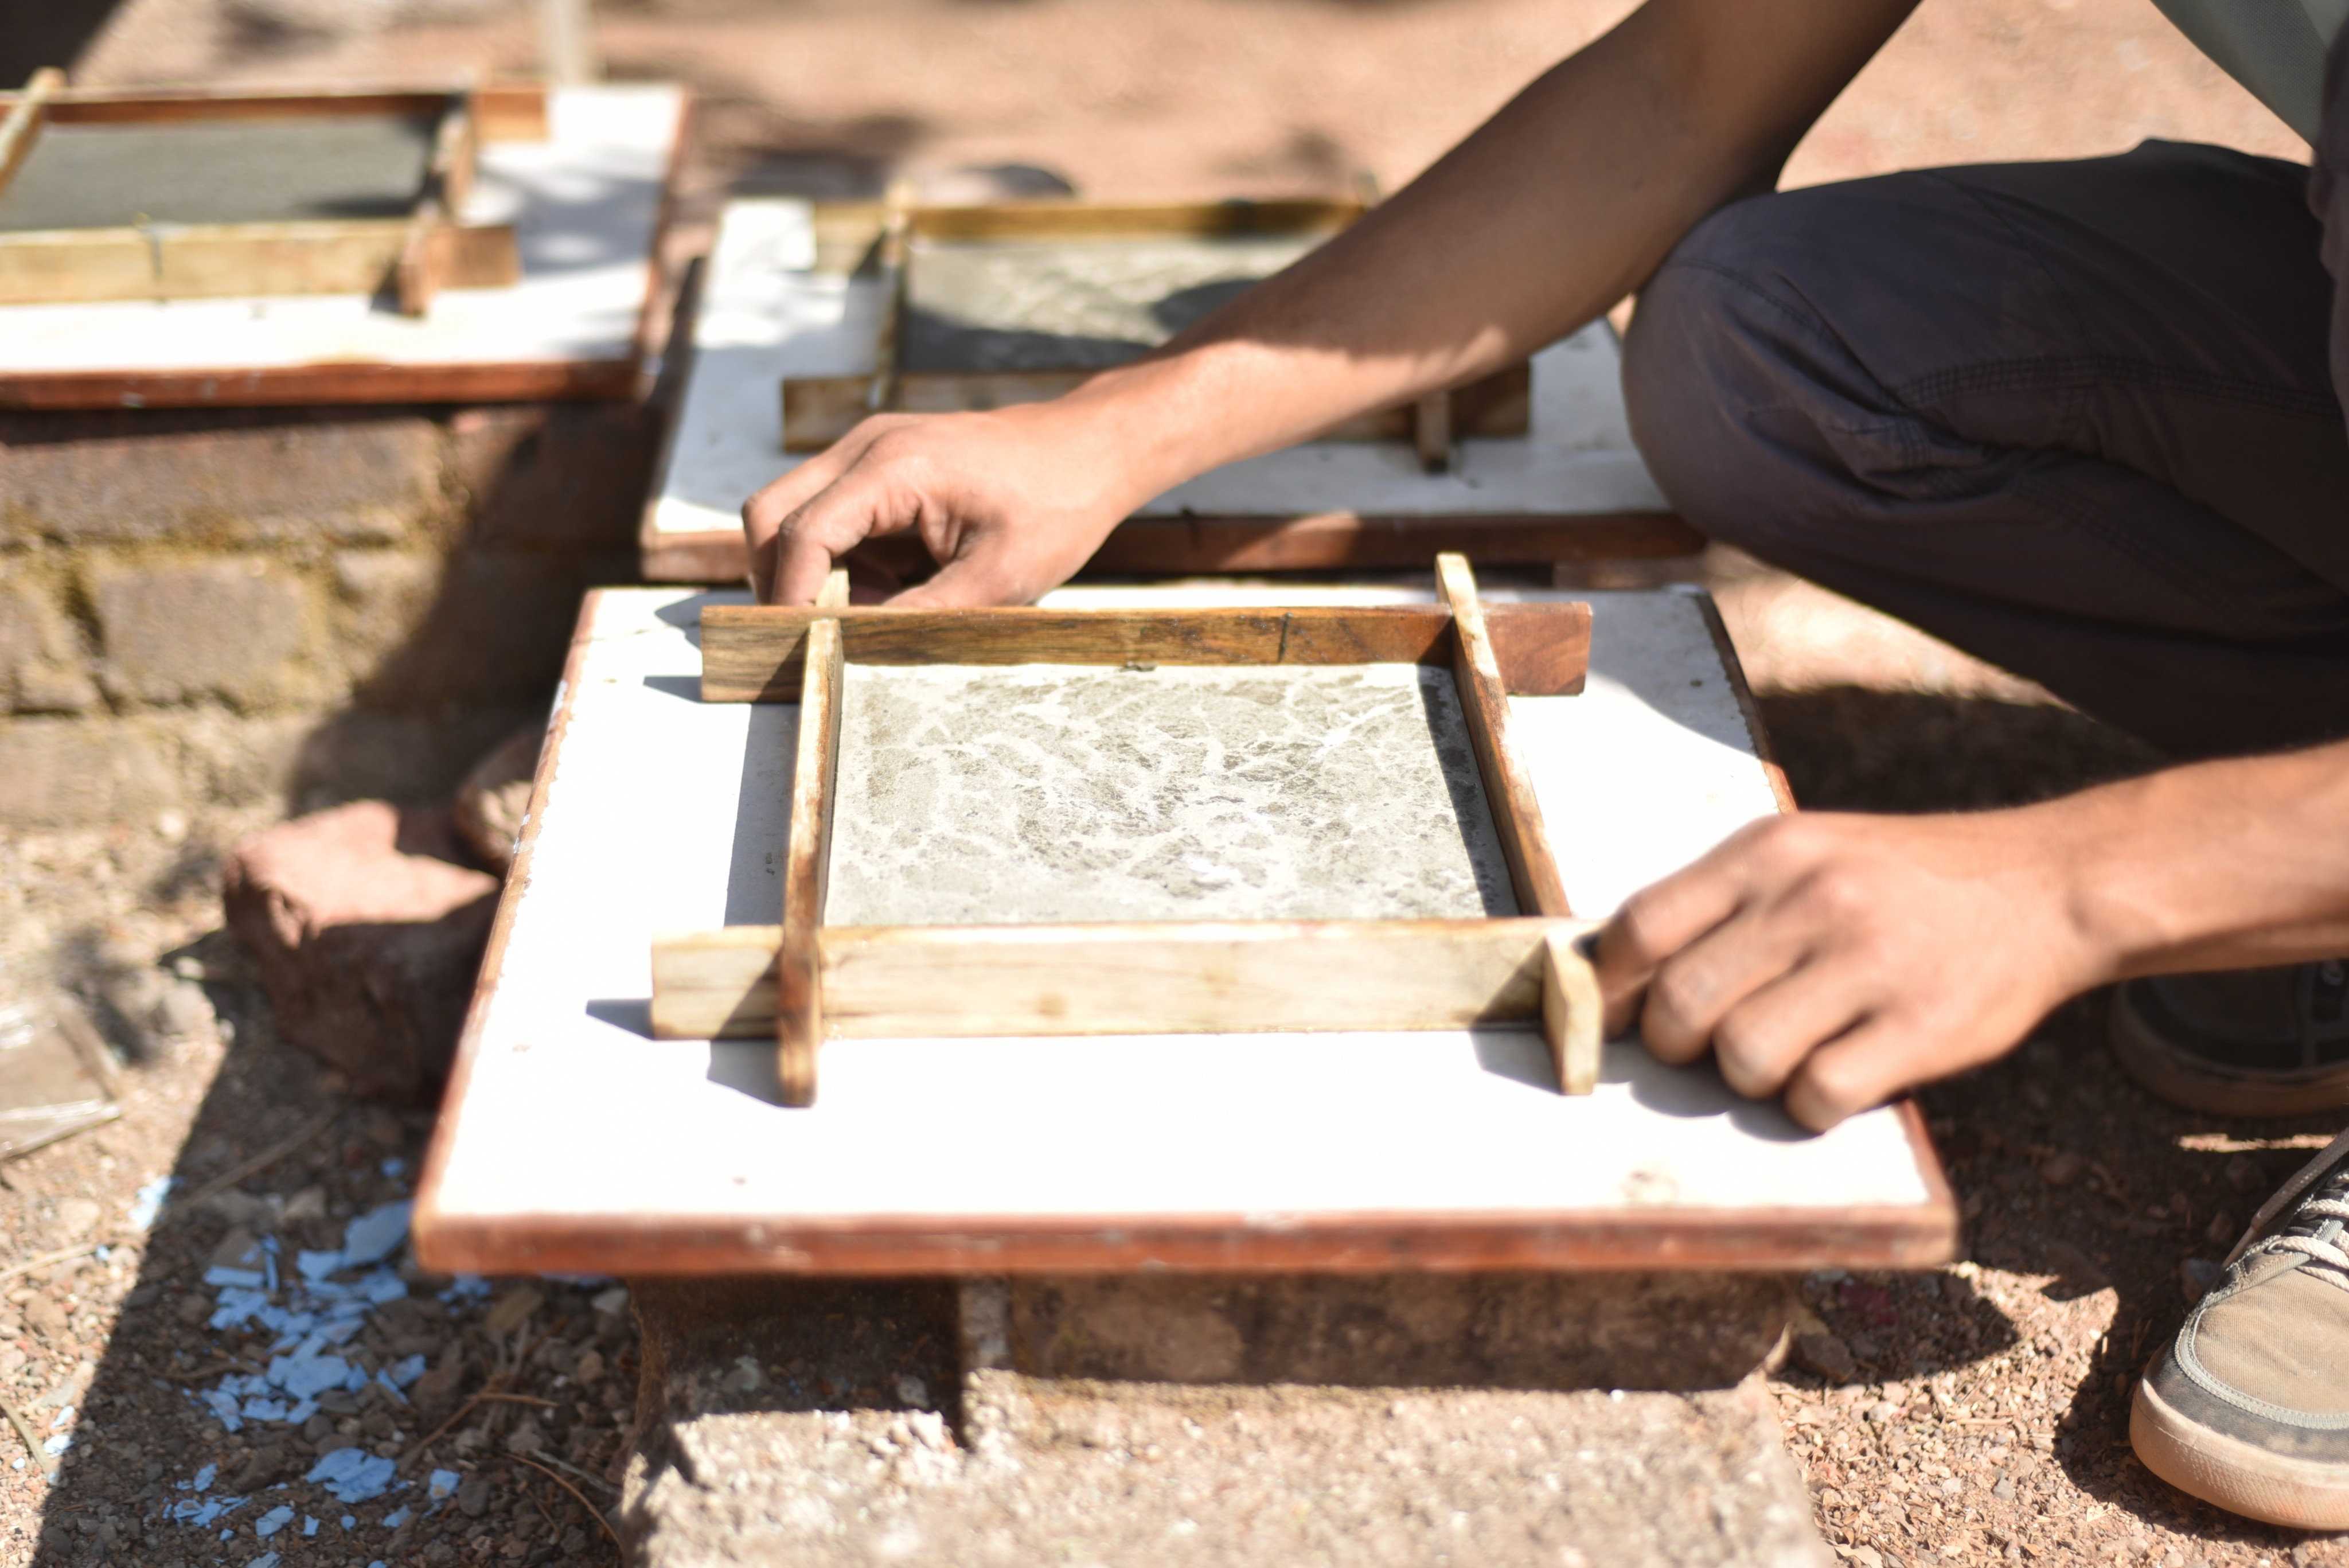
Casting sequence
Bubble Wrap
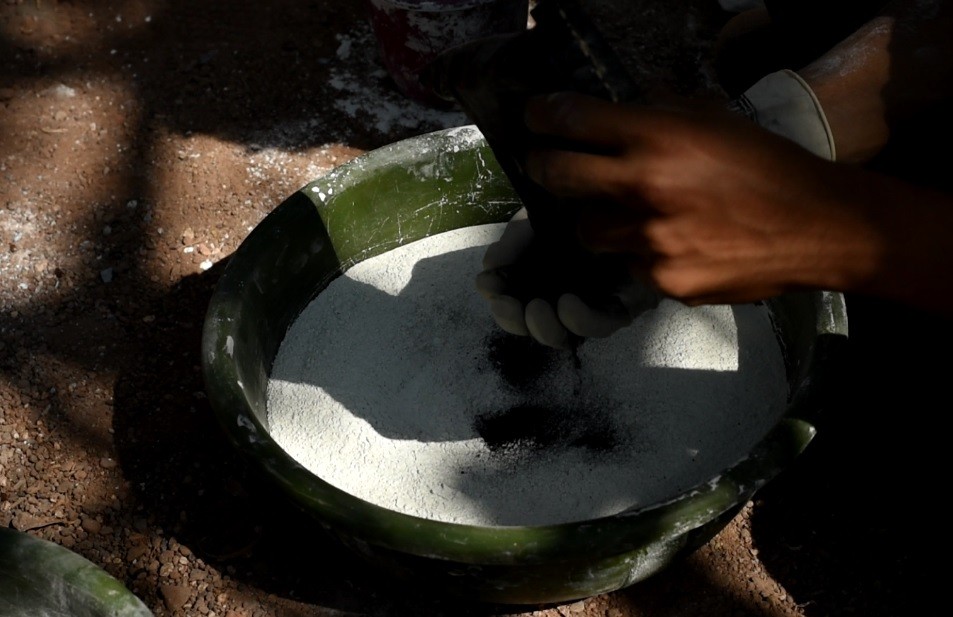
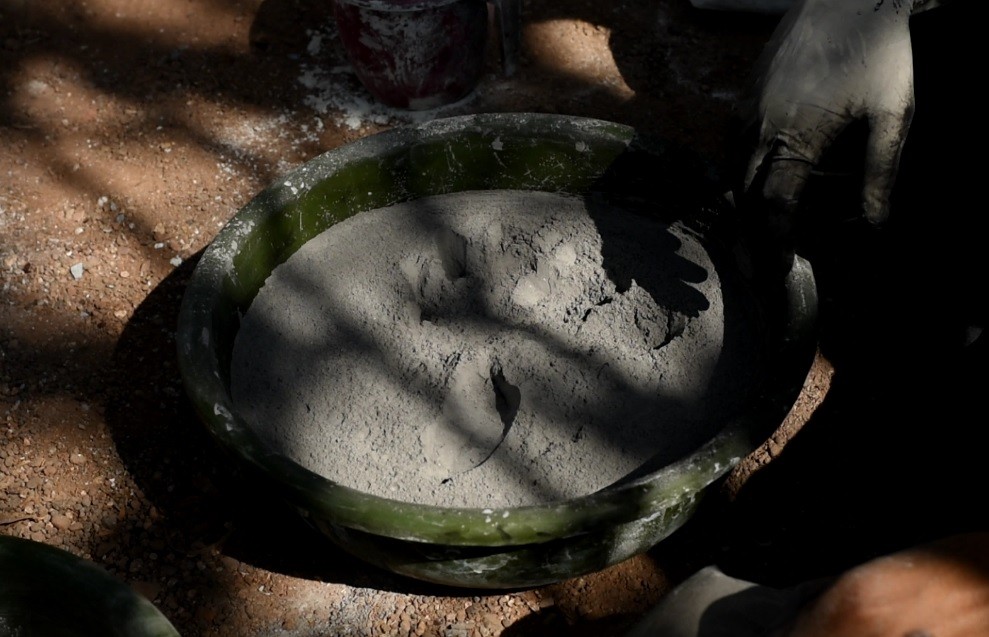
Preparing dry mix consisting of gray/white cement and oxide

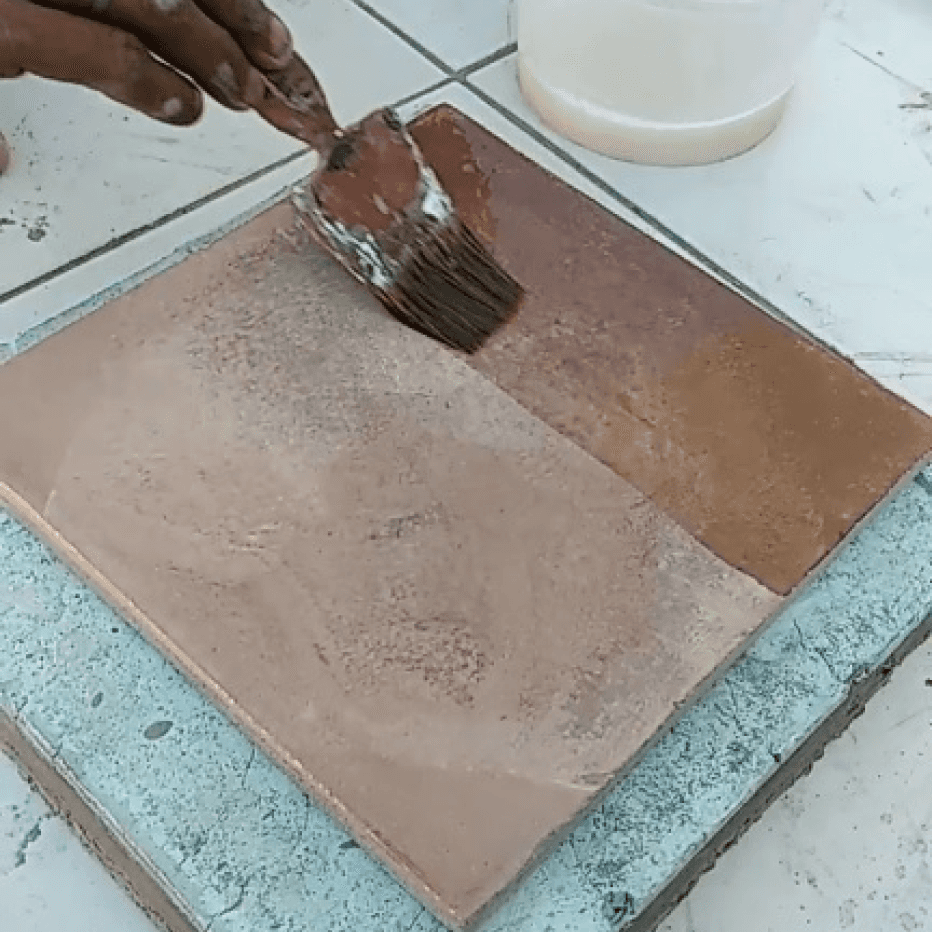
Casting the top pigmented layer
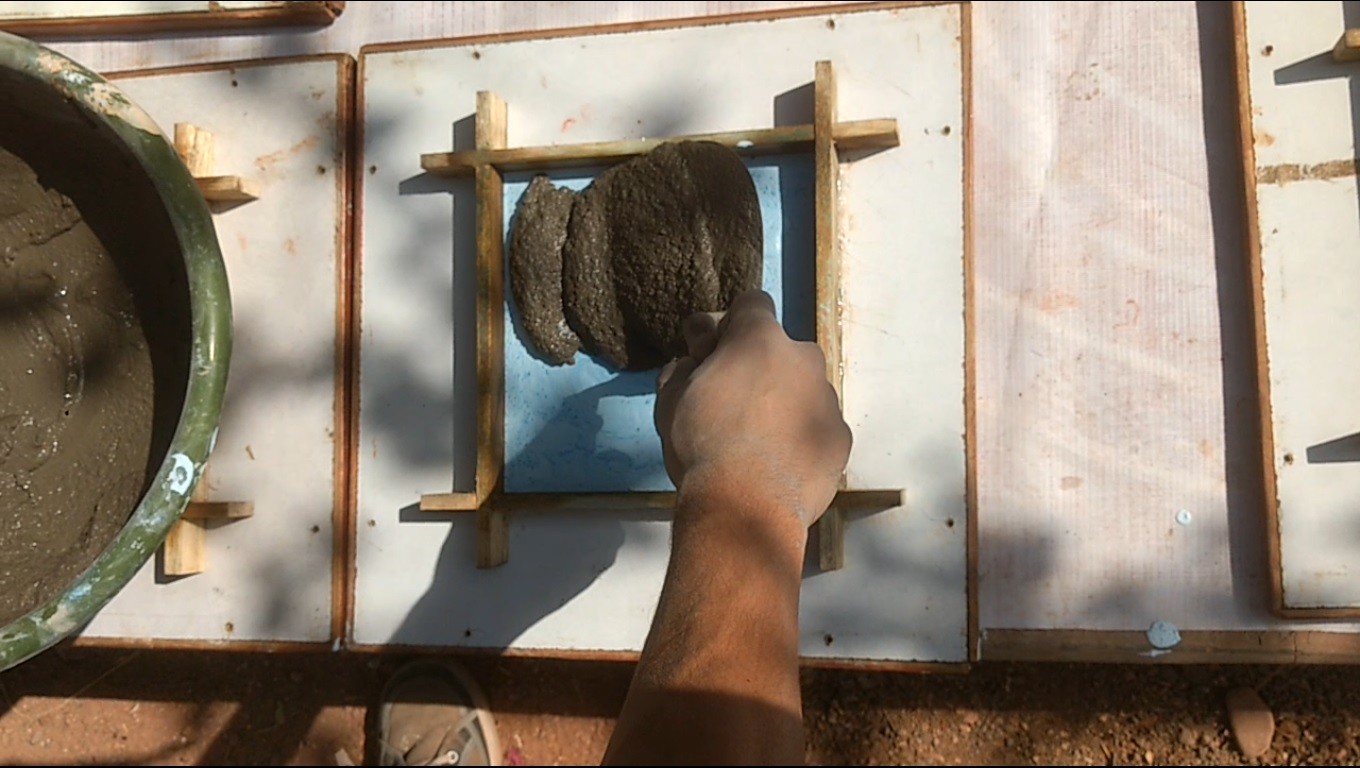
Preparing and casting mortar layer

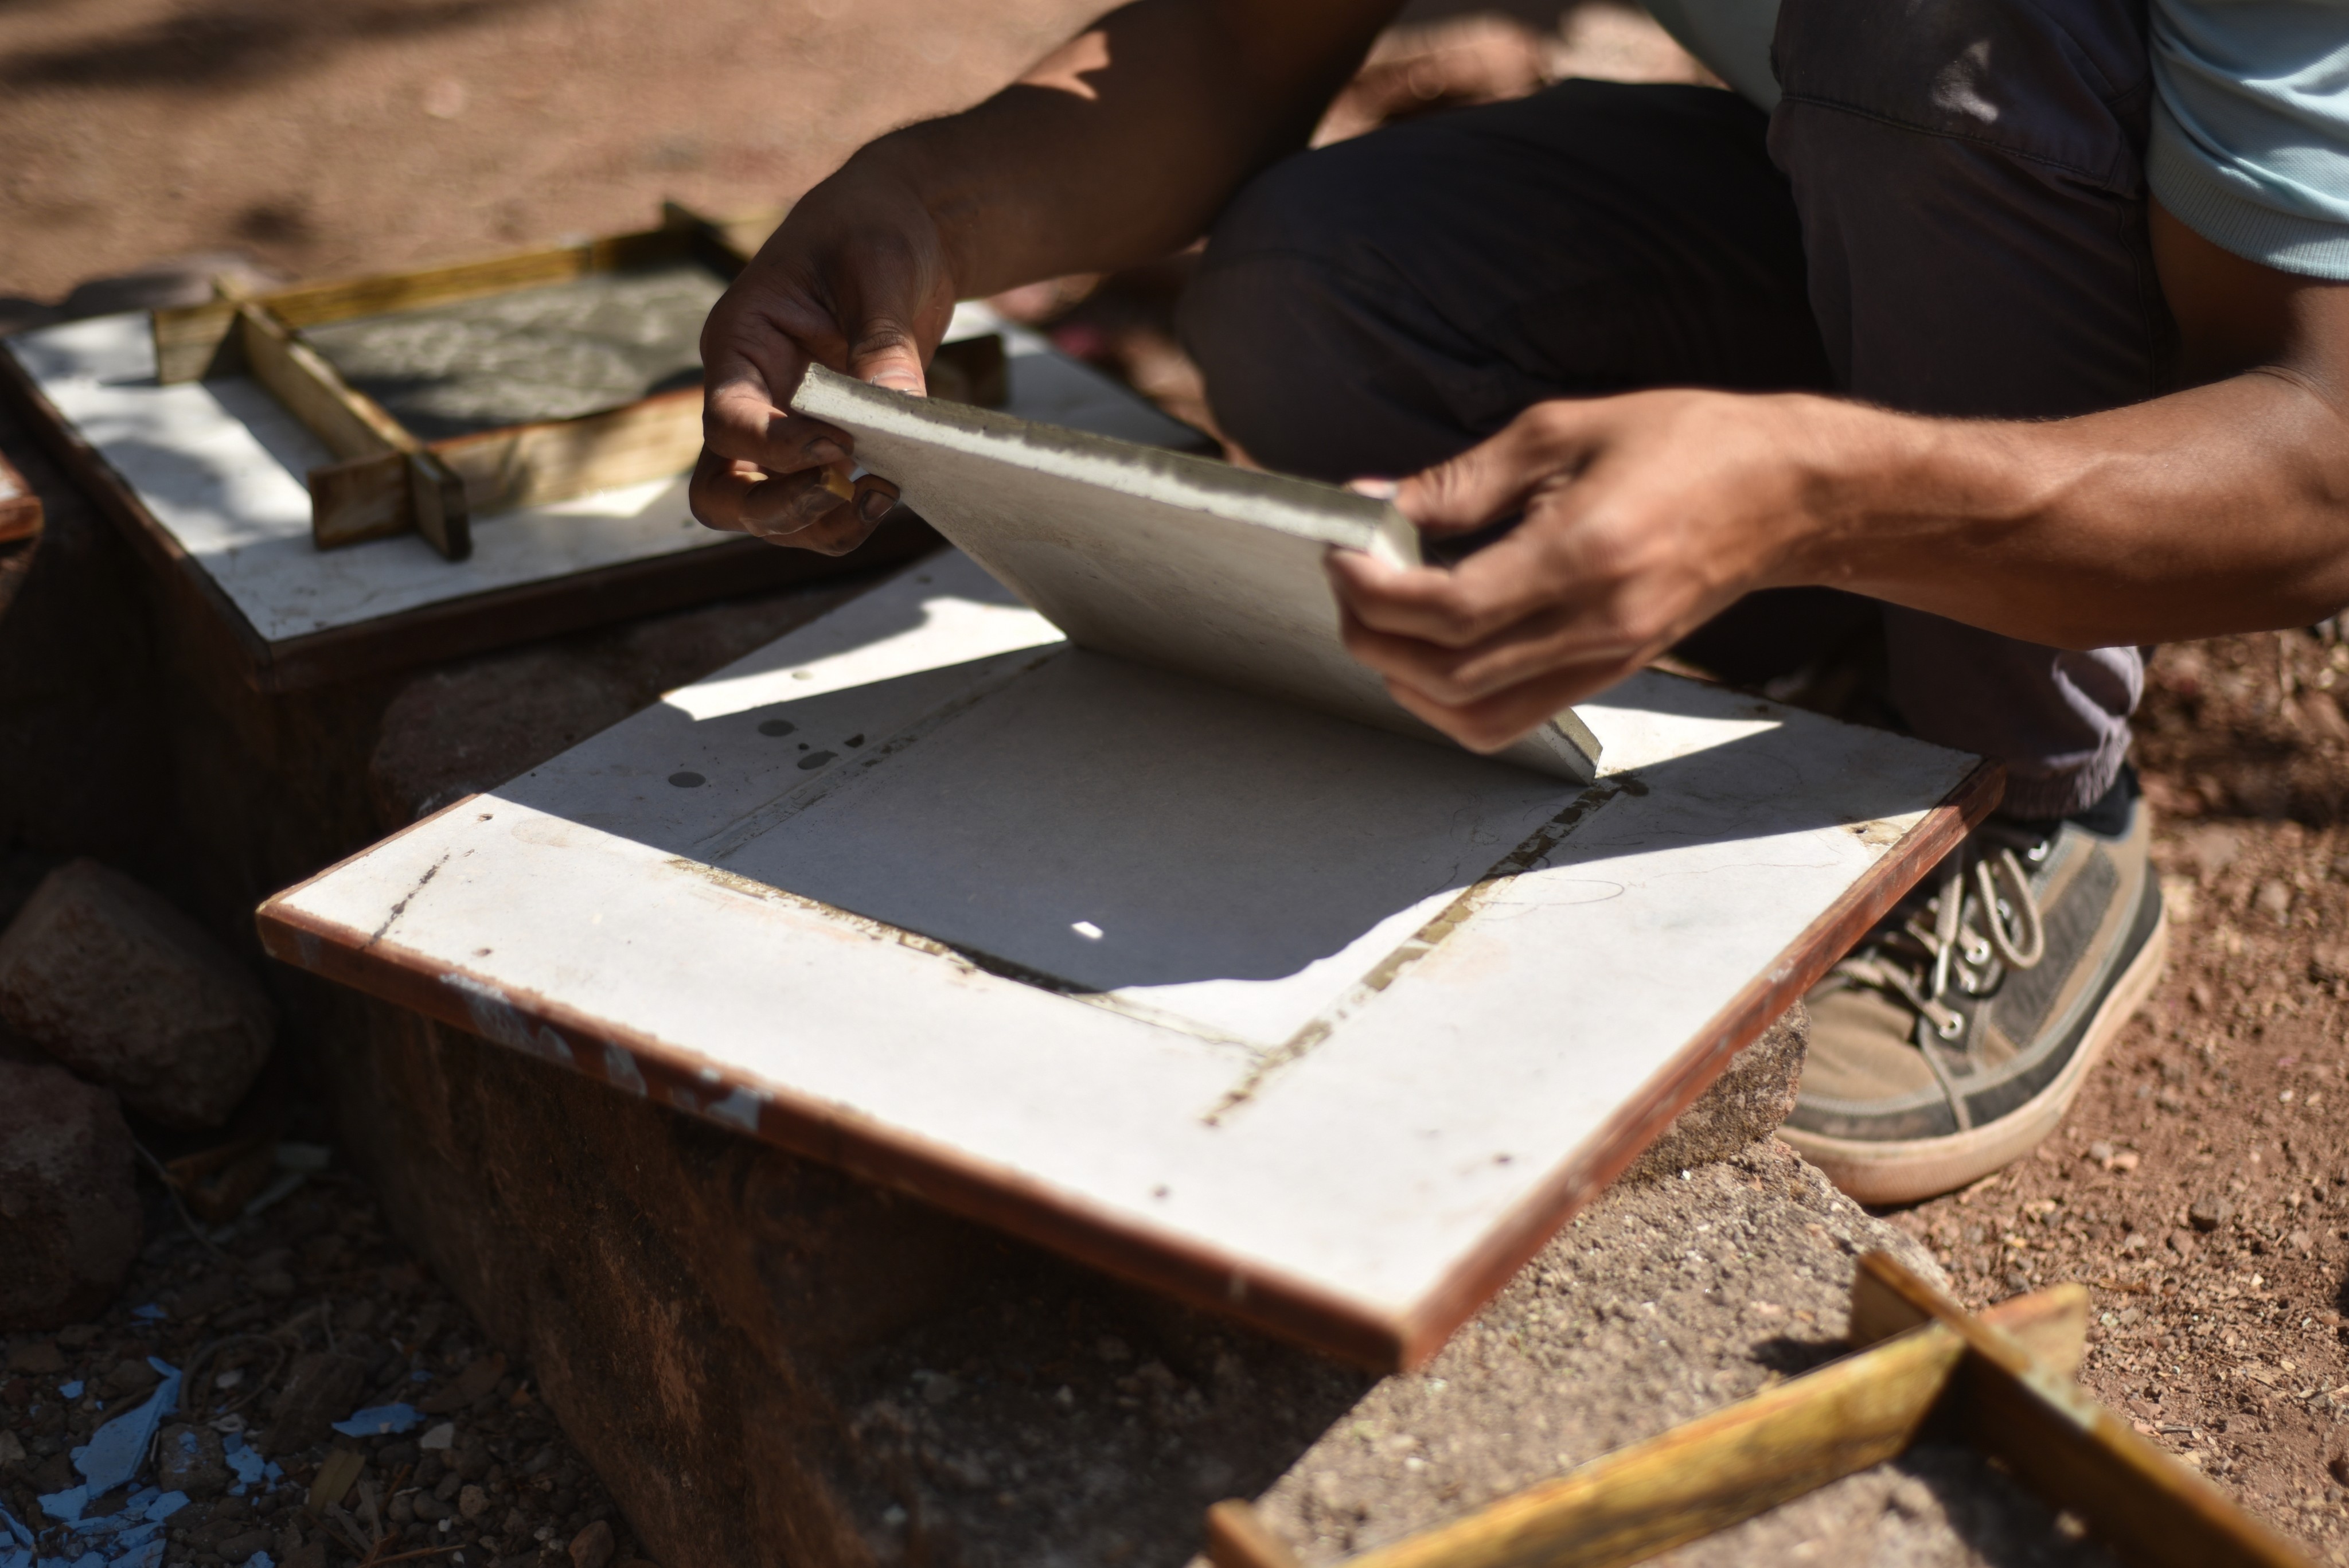
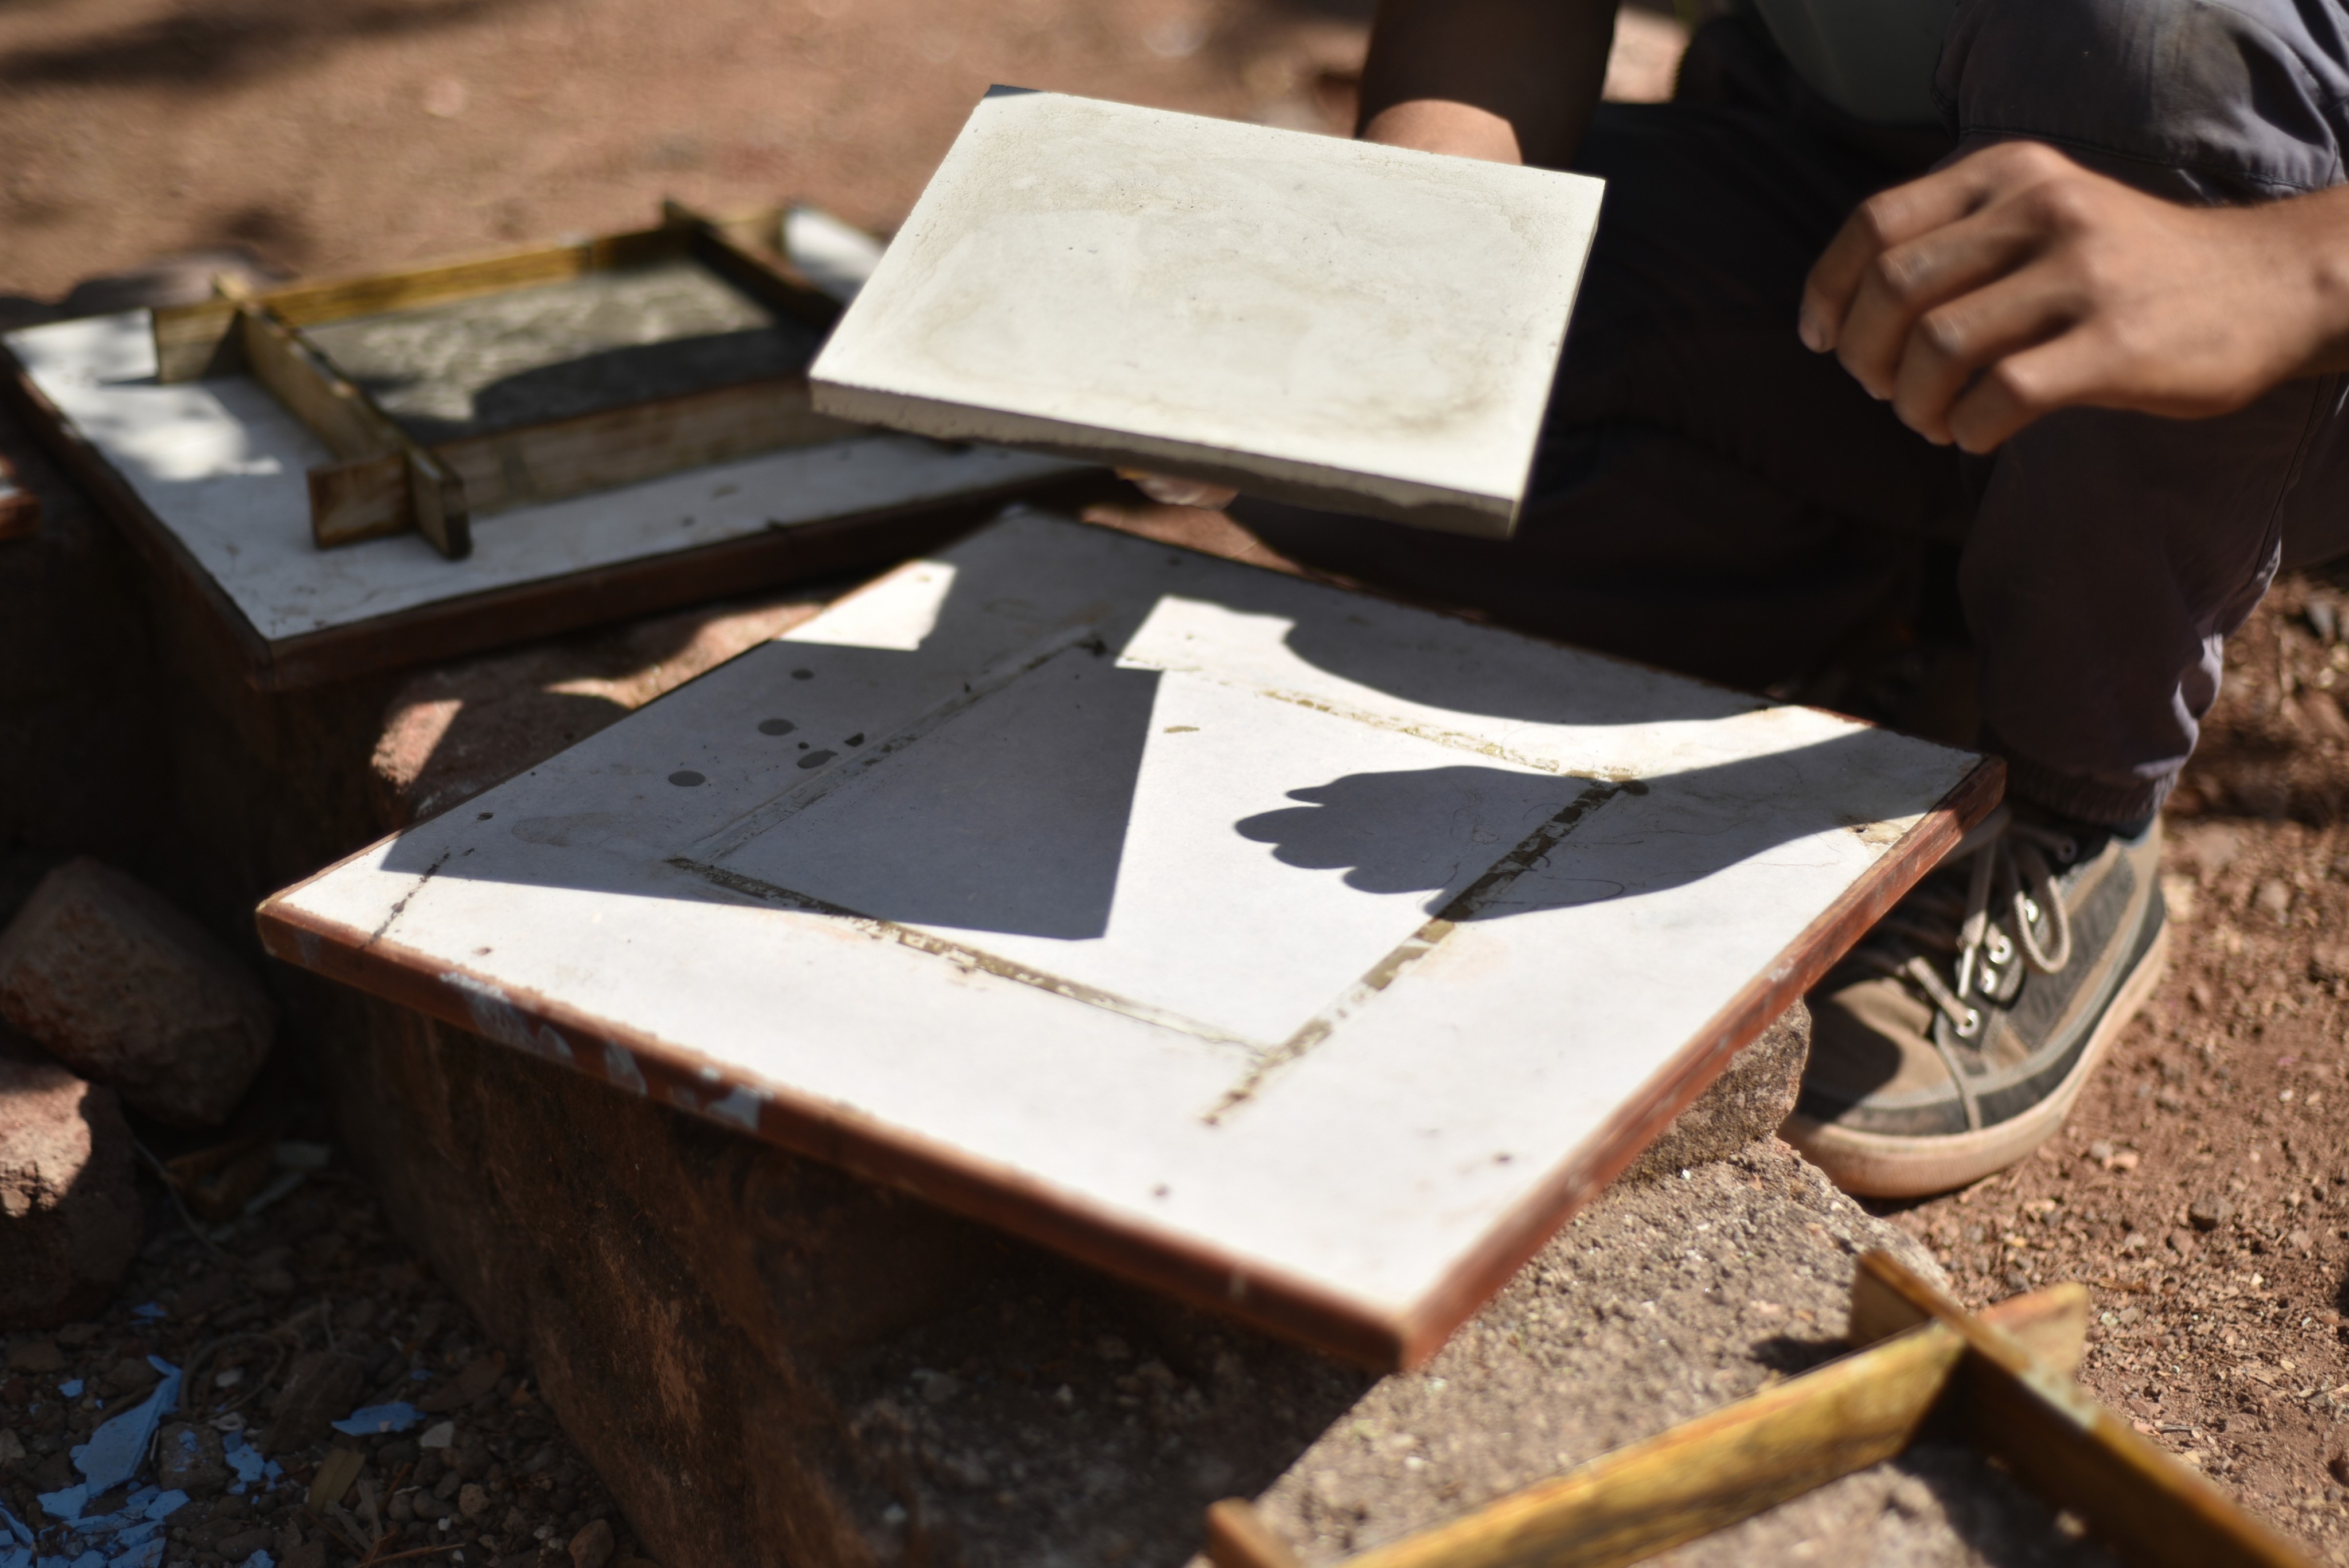
Opening the mould
Challenges and their solutions in the Process
Bonding between the top slurry layer and bottom mortar layer.
Casting in the morning and evening to increase the settling time
Using admixture to improve workability of cement.
To achieve the right shade of the slurry
Preparing the dry mix samples of the shades and using it to achieve the right shade during the production
Achieving workability in the mortar without loosing the strength.
Using admixture to achieve the workability and increase the setting time
Broken corners while removing the mould.
Taping the mould while casting to remove the trapped air, making the cast uniform
Wrapping the freshly casted tile in jute cloth and curing it to retain the water
Applying the burnt oil on the wooden frame especially at the corner junctions, so the cement doesn't bond with the base
Shade of the tile and pattern on it after removing it from the mould
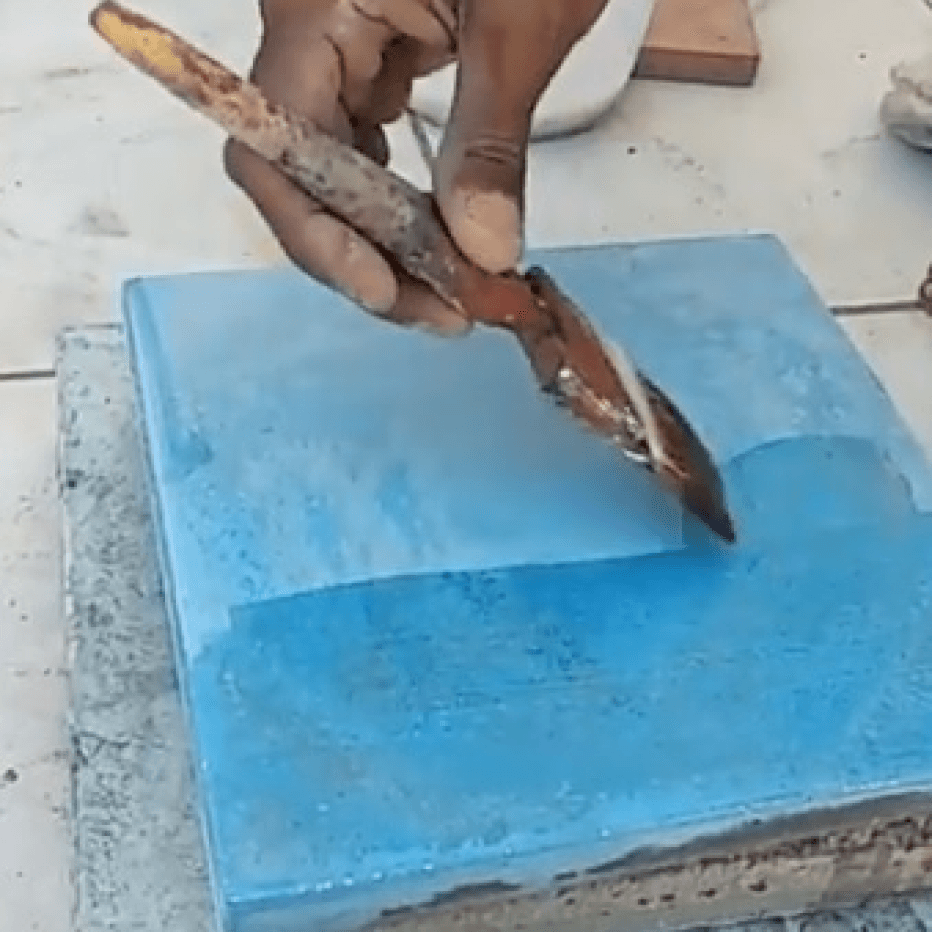
Polishing the tiles to have matte finish and to reduce the roughness
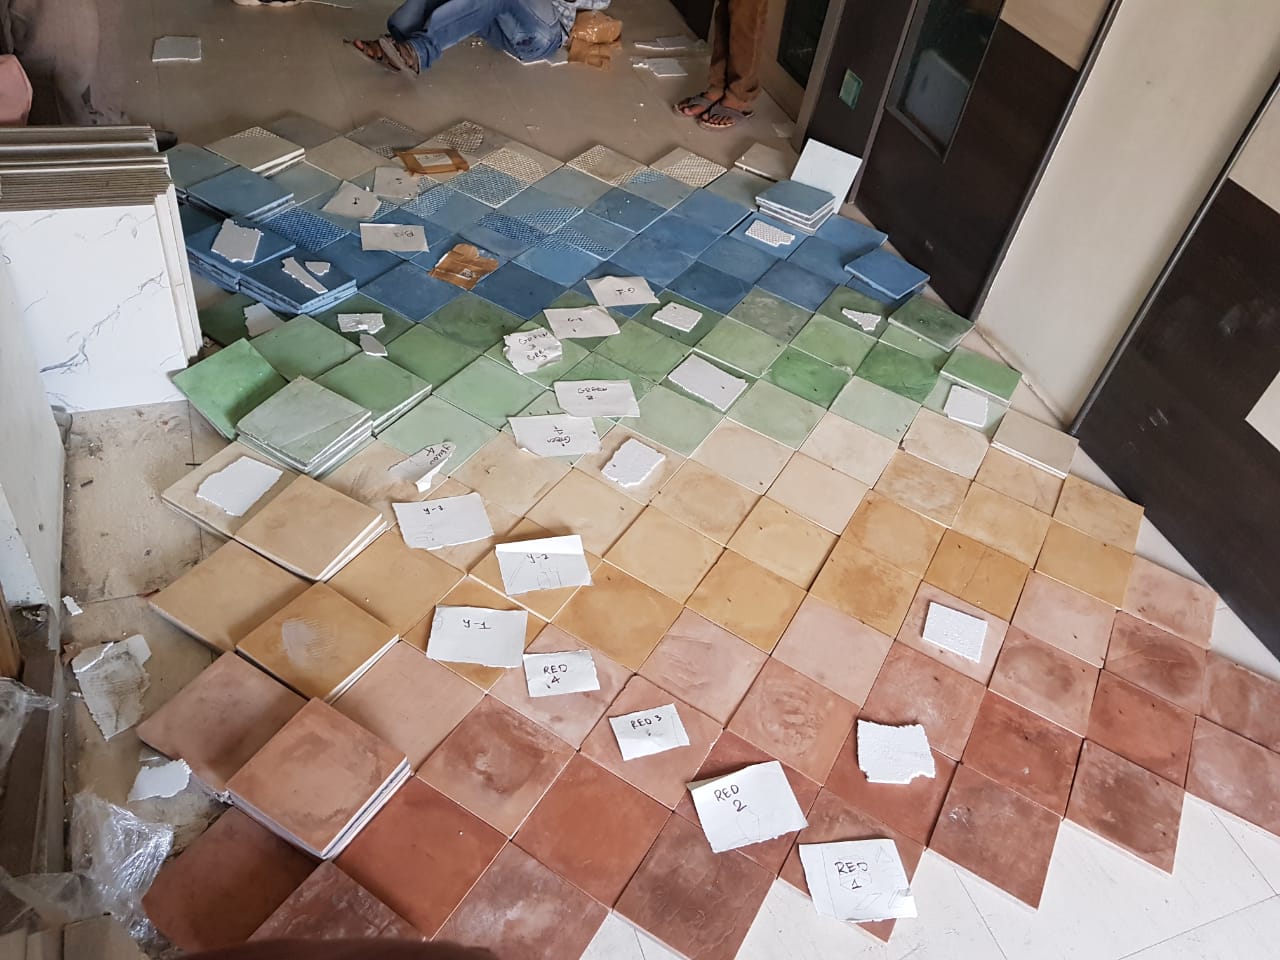
Labeling each row of tiles on site for ease of execution
Wooden Beading were provided in the spacing to support the tiles
Final Outcome
Click to see more photos
Learnings
This project helped in gaining a thorough understanding of Cement’s characteristics like its setting time, finish, workability and strength with respect to proportion. These understanding is valuable for identifying causes of problems in concrete construction.
Small details like casting time, vibration, water quality, sequence are very important in achieving the desired finish. These details can be known through research but being physically involved in the process would provide a more relevant information of the system.
As it was our first experience with such a project, we were not aware about all the expenses that we would have to bear. And thus it taught a lot about allocating right amount of resources in each process and how to charge for the service.
Brief
Casting cement tiles of different shades in gradation for a 3' x 6' wall mural in a ceramic import export office
Hands on
The process included experimenting with cement, various shades of oxide, different ways to create pattern on the tiles.
Pattern exploration by casting different leaves
Pattern exploration through bubble wrap and sand casting
Different shades created from different proportion of the oxide and mixing it with white or gray cement based on required shade
Mortar
Cement Slurry with
pigmented oxide
Wooden Frame
Wooden Base
Rubber Glue
Casting sequence
Bubble Wrap
Preparing dry mix consisting of gray/white cement and oxide
Casting the top pigmented layer
Preparing and casting mortar layer
Opening the mould
Challenges and their solutions in the Process
Bonding between the top slurry layer and bottom mortar layer.
Casting in the morning and evening to increase the settling time
Using admixture to improve workability of cement.
To achieve the right shade of the slurry
Preparing the dry mix samples of the shades and using it to achieve the right shade during the production
Achieving workability in the mortar without loosing the strength.
Using admixture to achieve the workability and increase the setting time
Broken corners while removing the mould.
Taping the mould while casting to remove the trapped air, making the cast uniform
Wrapping the freshly casted tile in jute cloth and curing it to retain the water
Applying the burnt oil on the wooden frame especially at the corner junctions, so the cement doesn't bond with the base
Shade of the tile and pattern on it after removing it from the mould
Polishing the tiles to have matte finish and to reduce the roughness
Labeling each row of tiles on site for ease of execution
Wooden Beading were provided in the spacing to support the tiles
Final Outcome
Click to see more photos
Learnings
This project helped in gaining a thorough understanding of Cement’s characteristics like its setting time, finish, workability and strength with respect to proportion. These understanding is valuable for identifying causes of problems in concrete construction.
Small details like casting time, vibration, water quality, sequence are very important in achieving the desired finish. These details can be known through research but being physically involved in the process would provide a more relevant information of the system.
As it was our first experience with such a project, we were not aware about all the expenses that we would have to bear. And thus it taught a lot about allocating right amount of resources in each process and how to charge for the service.